**** DONE: Bf109F-1, W.Nr. 5628, Werner Molders, Stab JG51, Me/FW Group Build.

Ad: This forum contains affiliate links to products on Amazon and eBay. More information in Terms and rules

Thanks very much for the kind words chaps !
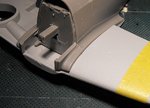
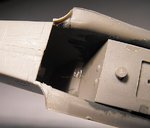
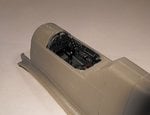
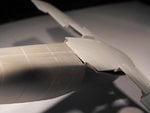
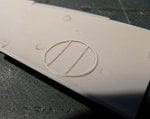
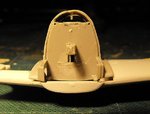
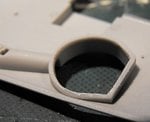
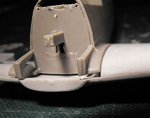
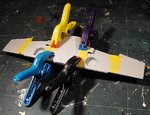
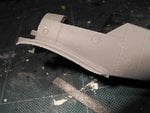
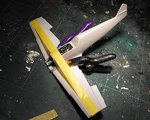
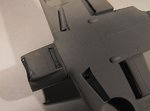
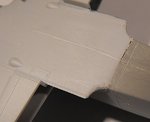
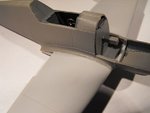
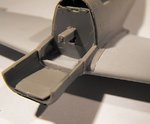
Got the fuselage together, and now working on getting the wing to 'sit' properly, and figuring out how to best line up, brace and attach the five-piece cowling. Pics tonight - if I don't say "B*ll*cks to it" and go to the pub instead !!
 
Thanks Cory.
This kit certainly needs to have constant test-fitting and planning of the build, although overall it's rather nice.
There was a pronounced raised area each side of the lower fuselage joint, which has now been filed and sanded smooth, and the joints re-engraved to simulate the two halves of the full-sized kite, as well as re-engraving the panel lines where damaged. Work is underway adjusting the wings and lower fuselage centre section, to obtain a flush fit of the lower wing and upper wing roots.
PIC 1. The fuselage joined and the joint lines sanded. The forward, upper joint has been left just 'tacked' together, to facilitate the fitting of the wings and cowlings, and this will be attended to later.
PIC 2. The cockpit area looks acceptable now the fuselage is joined.
PIC 3. The raised 'flanges' at the corners of the fuselage trailing edge aperture have been filed down to allow the wing to 'sit' properly.
PIC 4. Here the trailing edge of the lower wing has been partly sanded, and still shows a distinct step, even loosely fitted. This part was filed and sanded on both sides of the trailing edge, until it mated smoothly with the fuselage. The edges of the lower wing root fillet will be trimmed flush once the wing is set.
PIC 5. Trial fit after sanding, showing a much better fit.
PICS 6 and 7. Test-fitting of the upper wing halves indicated that the wheel well mouldings, and the internal 'bracing' on the inner surface of the upper halves were fouling, preventing the leading edge from joining fully. These were sanded and trimmed until a good, almost 'snap' fit was achieved.
PICS 8 to 10. Test fitting of the wing, taped together for this exercise, proved that the wings need to be joined first, which will allow the fuselage to be prised into place and set. If just the lower wing was fitted, the upper halves would be pushed outboard by around 2 to 3 mm. It's imperative that a good, strong joint is achieved here, as bracing may need to be added to help fit the lower oil cooler cowling. The two halves of the forward cowling can then be fitted, and aligned with the split engine cowlings, although I anticipate some fiddling and filler will be required. I also need to figure out the best way of fitting the exhausts and heat shield to the correct spacing, as the engine assembly is not being used.
Thanks for your continued interest and compliments, and I'll post some more pics soon.
 

Attachments

  • Molders Bf109F 041.jpg
    Molders Bf109F 041.jpg
    28.8 KB · Views: 143
  • Molders Bf109F 061.jpg
    Molders Bf109F 061.jpg
    54.2 KB · Views: 233
  • Molders Bf109F 050.jpg
    Molders Bf109F 050.jpg
    53.3 KB · Views: 142
  • Molders Bf109F 042.jpg
    Molders Bf109F 042.jpg
    39.1 KB · Views: 139
  • Molders Bf109F 051.jpg
    Molders Bf109F 051.jpg
    32.5 KB · Views: 158
  • Molders Bf109F 052.jpg
    Molders Bf109F 052.jpg
    30.8 KB · Views: 150
  • Molders Bf109F 055.jpg
    Molders Bf109F 055.jpg
    41.6 KB · Views: 139
  • Molders Bf109F 056.jpg
    Molders Bf109F 056.jpg
    45.1 KB · Views: 132
  • Molders Bf109F 054.jpg
    Molders Bf109F 054.jpg
    44.2 KB · Views: 139
  • Molders Bf109F 057.jpg
    Molders Bf109F 057.jpg
    44.1 KB · Views: 143
Thanks Glenn. Your clamps are currently being put to good use, holding the wing assembly whilst it sets !
Busy filing down the wing root fillets to obtain the correct dihedral.
 
The wings assembly is now on, although I can't check accuracy of the dihedral until it is almost fully set, and the clamps are removed. Like ICM's Spitfire kits, some adjustment at the wing roots, both wing and fuselage, was required, in order to prevent almost neutral dihedral.
PIC 1. The wing halves successfully joined, and taped and clamped until set. (Thanks again for those marvellous little clamps Glenn !).
PIC 2. Careful filing of the fuselage wing roots, to allow the wings to be set to the correct dihedral. Just like the Spitfire kit, one side (starboard) needed a little more shaving off than the other side, with the top wing joint also needing a smidgen of plastic removing.
PIC 3. The wing assembly cemented in place, with clamps holding the rear of the wing root joint tightly together. The tape is tensioned just enough to (hopefully) set and hold the dihedral until set.
Once everything is secure, final finishing sanding will be completed on the wing leading edges, and if required, around the roots. Then it's time to do battle with the nose assembly!
Thanks again for looking, and more very soon.
 

Attachments

  • Molders Bf109F 063.jpg
    Molders Bf109F 063.jpg
    76.6 KB · Views: 151
  • Molders Bf109F 064.jpg
    Molders Bf109F 064.jpg
    52.6 KB · Views: 132
  • Molders Bf109F 066.jpg
    Molders Bf109F 066.jpg
    85 KB · Views: 138
Thanks Woody and David.
The wing has set nicely, with only light sanding required here and there at the joints. The oil cooler bath and lower cowling have been assembled and painted, and fitted to the front of the wing centre section.
PIC 1. The underside trailing edge joint, which needs a tiny bit of filler. The central panel line on the wing centre section was out of line with the fuselage joint, so this was sanded off and re-engraved.
PICS 2 and 3. The lower cowling and oil cooler in place. Once fully set, the joints will be tidied up, and then the job of aligning the two-piece nose cowling, exhausts, and both engine cowlings will be tackled, as well as fabricating a prop shaft, as the kit's shaft is part of the engine reduction gear. I anticipate some fiddly work and a few new swear words here !
PIC 4. Relatively neat wing root joints, which will be checked after priming, to see if they need any filler.
Thanks again for your interest, and more probably tomorrow.
EDIT: Crossing posts; thanks Andy and Peter.
 

Attachments

  • Molders Bf109F 070.jpg
    Molders Bf109F 070.jpg
    36.7 KB · Views: 139
  • Molders Bf109F 069.jpg
    Molders Bf109F 069.jpg
    40.5 KB · Views: 185
  • Molders Bf109F 072.jpg
    Molders Bf109F 072.jpg
    35.4 KB · Views: 133
  • Molders Bf109F 075.jpg
    Molders Bf109F 075.jpg
    42.6 KB · Views: 131
Last edited:
Thanks very much indeed guys. I hope to get the rest of the nose area sorted later today.
 
Great work Terry. Looks like all the ICM kits seem to have quite a lot of fit problems. I may be regretting buying those two spitfires....
 

Users who are viewing this thread

Back