Navigation
Install the app
How to install the app on iOS
Follow along with the video below to see how to install our site as a web app on your home screen.
Note: This feature may not be available in some browsers.
More options
You are using an out of date browser. It may not display this or other websites correctly.
You should upgrade or use an alternative browser.
You should upgrade or use an alternative browser.
**** DONE: Bf109F-2/U 'Special' - Adolf Galland - Aircraft of the Aces GB (1 Viewer)
- Thread starter Wayne Little
- Start date
Ad: This forum contains affiliate links to products on Amazon and eBay. More information in Terms and rules
More options
Who Replied?Airframes
Benevolens Magister
Rather nice.
brucejscott
Staff Sergeant
Very impressive Wayne!
Coors9
Senior Airman
Wicked job Mr. Little.
- Thread starter
- #146
Crimea_River
Marshal
I always admire the cleanliness of your work Wayne. Were you a surgeon at one time?
- Thread starter
- #148
Dunno mate....maybe? ")
Done most of the bottom today too...looks much the same as the top!
Done most of the bottom today too...looks much the same as the top!
T Bolt
Colonel
vVry nice Wayne
Starting great Wayne!
- Thread starter
- #151
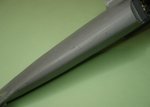
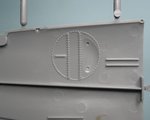
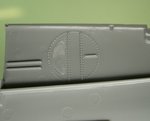
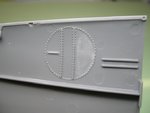
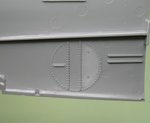
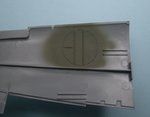
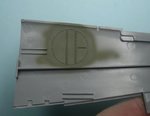
Ok, progress continues, the wings have a concave area within the wheel well area a carry over from using the same wing from the G-6 kit, small 'filler' shapes are suppose to be glued into these concave areas....the fit is not perfect but i went ahead and shaped them a bit to fit, pretty ordinary....i wacked some super glue around the edges and once dry started sanding and scrapping to blend the area, wasn't impressed....so tried a plan 'B' with a second set of wings. Put a large drop of super glue in the concave area of the 'new' wings and spread it carefully to fill the area, set the wings aside carefully so they sat just right for the glue to settle and set. Then repeated the procedure yesterday again with a bit less glue and again left them to set.
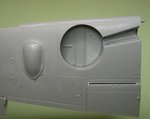
today i used my hobby knife with the rounded blade and carefully scrapped the surface smooth and blended them with the surrounding plastic, then some very careful light sanding and it looked pretty good! This process seemed to yield a better result with less fuss and effort than the plugs, which I will still have to deal with later.....on the next project. Will spray some RLM 02 over the areas Saturday and if ok will glue the wings together and move on!
Pic.1 the concave area Pic 2 the plug fitted on one wing. Pic 3. scrapping and sanding of the other wing plug. Pic 4 the alternate superglue fill scrapped and sanded. Pic.5 a dry fit of one wing....
Attachments
Last edited:
nice fix Wayne, hope the other set of wings arn't a write off !
- Thread starter
- #153
nice fix Wayne, hope the other set of wings arn't a write off !
Nah, just have to spend more time getting them blended right without affecting the surrounding detail....the super glue settled just right with 2 layers.....and Thanks mate!
Airframes
Benevolens Magister
Good stuff Wayne.
Crimea_River
Marshal
Great fix. So I gotta ask, what to you use to sand in such a confined area so that you don't knock down the rivets?
brucejscott
Staff Sergeant
Looking good Wayne.
- Thread starter
- #157
Great fix. So I gotta ask, what to you use to sand in such a confined area so that you don't knock down the rivets?
Pics of these Hi-tech tools tomorrow Andy!
Crimea_River
Marshal
Great! I've resorted to wrapping paper around a sharp pointed eraser. Have also melted sprues into little trowels and superglued the paper on so I'm curious what you do.
- Thread starter
- #159
Them Hi-tech tools Andy...very expensive too 
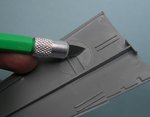
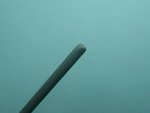
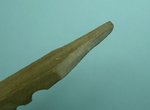
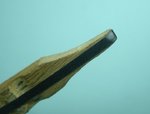
first up is the rounded blade of the hobby knife to carefully scrape to shape, this allows you to get right to the edges without destroying the surrounding detail, then I use a rounded piece of sprue and a suitably shaped clothes peg, wrapped around the end of these "tools" is a thin 2-4mm strip of whatever grade sandpaper is needed, 400-800. then I do some careful sanding moving the strip of sandpaper around the edge every so often as the plastic/super glue 'dust' builds up.
If you get the scraping process right the sandpaper clean up is pretty simple to finish off the job.
Also painted the wheel well areas to check my work and no sign of any problems!
Attachments
Last edited:
Airframes
Benevolens Magister
Love it !
Users who are viewing this thread
Total: 2 (members: 0, guests: 2)