- Thread starter
- #1,221
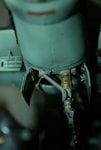
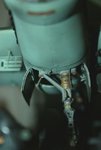
remeber the golden coversare you going to "wire" the legs ?
Now...these golden covers...are they oval shaped and just go over the holes in the leg or a strip that goes all the way round, bit confused as to their actual shape?
And yes I think I will wire the legs...
Last edited: