- Thread starter
- #181
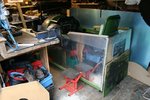
Decided to spend the day out in the shed / garden working on the '51 as it was a glorious day.....errrrrr, the weathermen got it wrong again !.
However, once I got in the groove, things started to get done.
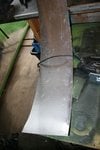
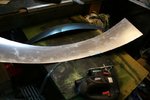
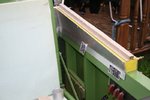
First off was cut and trial fit of what I call the bonnet / hood. Its a small panel infront of the windshield assembly. This went reasonalby well, but I need to do some fine fettling before its ready for paint. Oh, I also need a slack handfull of twist 'n'lock fasteners as well.
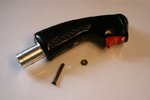
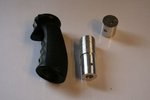
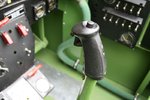
After a while, i then removed the stick grip I've been using and modified the support to take the correct style grip (recently aquired from e-bay). Nice to sit in the 'pit and grip a 'puikka' 'Stang grip.
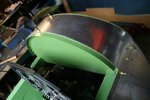
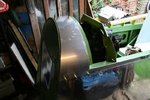
Then I decided to start on making covers for what I call the shoulders. Made a complete set for one side but may remake them as I'm not that happy with the overall finish. Problem I have is that the longerons arent original and its gonna be a b*ggers muddle to figure out the order of rremoval / refit to enable access the inside of the longerons to enable the rivetting to take place.
It goes something like...
Remove bonnet
Remove intermediate bulkhead
Remove instrument panel
Remove upper and lower instrument panel surrounds
Remove seat
Remove (de-rivet) primered shoulders
Remove longeron internal covers
Fit external shoulder skins and rivet lower two rivet runs.
Refit in reverse order !.
Ay least I don't have to disconnect the battery....just yet !")
Then it was pack it all away time....and yes, I did have another sit in and dream !
However, once I got in the groove, things started to get done.
First off was cut and trial fit of what I call the bonnet / hood. Its a small panel infront of the windshield assembly. This went reasonalby well, but I need to do some fine fettling before its ready for paint. Oh, I also need a slack handfull of twist 'n'lock fasteners as well.
After a while, i then removed the stick grip I've been using and modified the support to take the correct style grip (recently aquired from e-bay). Nice to sit in the 'pit and grip a 'puikka' 'Stang grip.
Then I decided to start on making covers for what I call the shoulders. Made a complete set for one side but may remake them as I'm not that happy with the overall finish. Problem I have is that the longerons arent original and its gonna be a b*ggers muddle to figure out the order of rremoval / refit to enable access the inside of the longerons to enable the rivetting to take place.
It goes something like...
Remove bonnet
Remove intermediate bulkhead
Remove instrument panel
Remove upper and lower instrument panel surrounds
Remove seat
Remove (de-rivet) primered shoulders
Remove longeron internal covers
Fit external shoulder skins and rivet lower two rivet runs.
Refit in reverse order !.
Ay least I don't have to disconnect the battery....just yet !
Then it was pack it all away time....and yes, I did have another sit in and dream !
Attachments
-
 IMG_6038.jpg127.8 KB · Views: 466
 -
 IMG_6052.jpg69.4 KB · Views: 454
 -
 IMG_6065.jpg67.4 KB · Views: 467
 -
 IMG_6066.jpg85 KB · Views: 468
 -
 IMG_6068.jpg39.5 KB · Views: 460
 -
 IMG_6071.jpg35.6 KB · Views: 466
 -
 IMG_6074.jpg60.6 KB · Views: 456
 -
 IMG_6080.jpg67.3 KB · Views: 445
 -
 IMG_6084.jpg60.4 KB · Views: 448
 -
 IMG_6086.jpg95.7 KB · Views: 462