Geedee's P-51D Cockpit Project

Ad: This forum contains affiliate links to products on Amazon and eBay. More information in Terms and rules

Chaps, apologies as I havent provided an update for a few months !:oops:.

Haven't done any real work on my babe, but have been busy still collecting bits 'n' pieces.

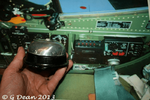
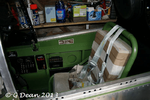
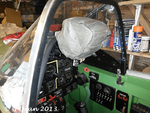
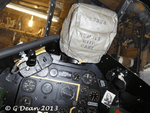
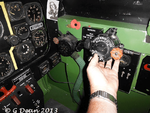
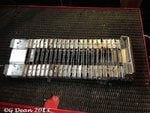
I've now got a 'Tail Warning' bell, dug out the IFF panel ready for some TLC, installed some seat belts that I got from the US, a rather nice un-issued gunsight cover for my K14 and also got a correct version USAAF oxy regulator.

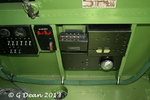
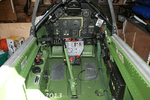
I'm going to be big and brave tomorrow and go out into the 'Shangar, ignoring the torrential rain thats been slated to hit us over the weekend, and I'm going to start stripping her down for in preparation for some some much needed Winter maintenance. This'll include fitting the new stuff over the next few month, moving the sound system to just behind the firewall, installing the new armor plate, a complete re-paint on the inside, and then its off to work on the outside.

Looking forward to getting stuck-in :)
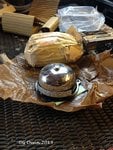
 

Attachments

  • 51.png
    51.png
    221.3 KB · Views: 173
  • 52.png
    52.png
    196.4 KB · Views: 176
  • 53.png
    53.png
    270 KB · Views: 174
  • 54.png
    54.png
    225.4 KB · Views: 173
  • 55.png
    55.png
    296.2 KB · Views: 172
  • 56.png
    56.png
    275.1 KB · Views: 174
  • 57.png
    57.png
    290.2 KB · Views: 172
Wow, thanks again for support chaps.

Well, as I said, I was going to brave the horrible weather and spend the day in the Shangar....only spent the morning wiv the missus on horse related duties instead !.

So I eventually ended up in the Shangar and this is how she looked before I started....I really need to get a bigger place to work on her !.

20.jpg


Then it was time to get stuck in, and quicker that a quick thing at a quick thing convention, the top panels where off and ....

21.jpg


Then it was time to start stripping her out.

26.jpg
25.jpg
24.jpg


Unfortunately, by the time I had finished, i had also just about run out of space to put the bits 'n' pieces away safely. I hate seeing her like this, but its for the better as now I can get to those parts and places I need to do remedial work on to bring her upto the standard I'm now looking for.

31.jpg
23.jpg
27.jpg
28.jpg
29.jpg
30.jpg


I did take the chance to trial fir the top section of armor plate only to find that ...hey guess what...non of the bl**dy holes line up so theres some major surgery in the offing !.

I'll keep you updated as things progress. I'm really looking forward to getting stuck back into the buidling / fabricating side of things again and when I've finished this time , she'll be markedly different :)

And this is how she looks at the moment :)

33.jpg
 
Thanks guys.

Swing from the rafters ?...yes mate, got plenty of chandelier pract....ooeerrrr, shouldnta said that :)

Srtipped the final bits out the tub now and am getting ready to start work over the Xmas break. Have recently acquired another Tail Warning Bell, this time with the makers plate attached and its in pristine condition (I was the guy who unwrapped it from its sealed state !) and have got some AC pulleys that will enable me to make the rudders pedals work as they should....more details later. And finally, I've got an original ammo feed chute for the inboard .50 so with the cooling jacket I also have, I will be making a replica .50 to take around on show.

Interesting snippet I picked up recently, the .50 bullet weighs 1.6 Oz. The .50 fitted to the fighters fired at 75 Rounds Per Minute...a 3 second burst from 6 X .50's would put 22.5Lbs of metal into whatever was in front of the guns ! :shock:
 

Attachments

  • 51.jpg
    51.jpg
    134.4 KB · Views: 150
  • 52.jpg
    52.jpg
    137.9 KB · Views: 156
  • 53.jpg
    53.jpg
    194.4 KB · Views: 149

Users who are viewing this thread

Back