Stug III at Kursk Armor Build

Ad: This forum contains affiliate links to products on Amazon and eBay. More information in Terms and rules

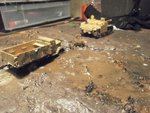
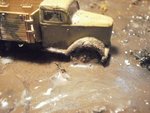
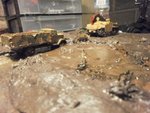
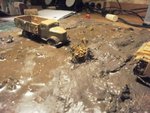
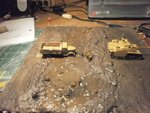
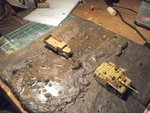
Diorama's going OK....water needs some brown in it....it looks bare, suggestions?

Its hard to tell its a teaser pic...

Stug isn't glued I have to take finished pics..

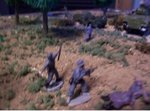
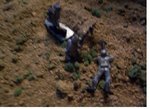
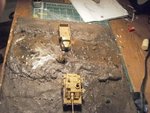
B, I post these not to make fun of you whatsoever, but rather to remind you of the sincere progress you have made, dude. These pics of your first diorama and night are day from your skill level now. What a difference a couple of years has made on your skills, knowledge and maturity. Keep it up, Bud!!!! :cool:
 

Attachments

  • 1.jpg
    1.jpg
    50.9 KB · Views: 99
  • 2.jpg
    2.jpg
    52 KB · Views: 88
  • 4.jpg
    4.jpg
    51.3 KB · Views: 83
Dirk, if you saw the actual size of the models - that diorama would fit easily on a mousepad!

Harrison, looking real good. I can see what you mean about the shoreline but just one word of advice - sometimes too much can ruin a good thing. What you have looks great and just take your time. You don't want to take the focus off the vehicles with an overdone ground base. From what I see, get the river bank set up and it'll be great!
 
Just build up and edge with filler and ground cover material. Make sure to 'break up' the outline, by adding clumps of grass, weeds and reeds, using the scenic materials you've got.
 
Yes, but make it thin, as it's supposed to be a pool. If you have any of the plaster bandage left, you could make some slightly higher banks here and there, only about the tickness of the bandage would do. I doubt you'll need the resin, just cover with the bandage, or plaster, or papier mache, then paint and add the ground cover material/grass etc.
 
got a question on the following truck is that the same scale as the Stug III ? it looks bloody big to me but might be the angle of your photo ?
 

Attachments

  • P7200342.JPG
    P7200342.JPG
    87.3 KB · Views: 85
  • P7200341.JPG
    P7200341.JPG
    75.9 KB · Views: 80
  • P7200339.JPG
    P7200339.JPG
    78.3 KB · Views: 90
  • P7200338.JPG
    P7200338.JPG
    89.2 KB · Views: 83
  • P7200337.JPG
    P7200337.JPG
    94.9 KB · Views: 84
  • P7200345.JPG
    P7200345.JPG
    96.9 KB · Views: 86
  • P7200346.JPG
    P7200346.JPG
    99.9 KB · Views: 84
Last edited:
Ok for the water I did what T suggested spray Acrylic brown and future thinly but I swished it around with a brush so it didn't look so uniform. Then I got some moss out of the back yard...sprayed with dullcote and held a bit between my fingers and the same thing you do with salt... your pointer finger nad thumb moving up and down. To add more texture I used a pasta strainer and took dirt and sifted through to get the other junk out then same thing sprinkled it on while the mud was wet.....and with a dry brush mixed it in. I added the bank with newspaper and plaster cloth. Just dip it in water and smooth out with your finger


Mud was made with Acrylic Resin, Plaster of Paris, and 3 MIG Pigments ( Light Dust, Europe Dust, and Russian Earth) then painted on to get the wet mud look.

Appreciate you guys taking your time to look at this.
 

Users who are viewing this thread

Back