Airfix 1/24 scale Bf109E.....or a bed of thorns

Ad: This forum contains affiliate links to products on Amazon and eBay. More information in Terms and rules

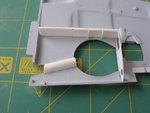
Terry, I used a piece of cardboard sheet, a pencil and scissors for that.There is a special gauge for taking correct cross-sections. But I don't have the one.

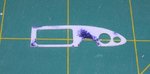
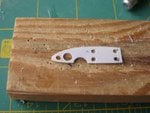
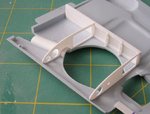
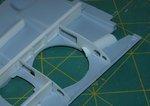
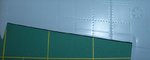
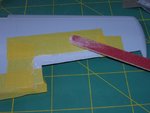
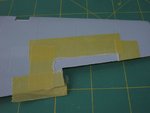
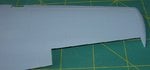
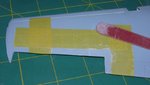
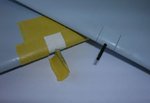
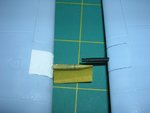
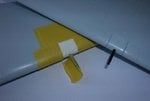
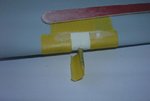
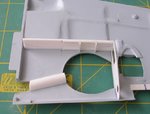
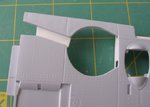
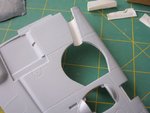
My next job was to make something that looked like " a gutter " that can be seen in pics of the area. Unfortunately thses troughs couldn't fill up all the "empty" areas.It was because of sockets of the main lenading gear legs. I made them used two thin plastic plates warmed up and wrapped on a wooden stick. Then I have cut parts that fitedt to these areas and glued with the Gunze lemon glue.
 

Attachments

  • ws9f.jpg
    ws9f.jpg
    92.2 KB · Views: 825
  • ws9f1.jpg
    ws9f1.jpg
    84.4 KB · Views: 280
  • ws9f2.jpg
    ws9f2.jpg
    83.7 KB · Views: 966
  • ws9f3.jpg
    ws9f3.jpg
    73.4 KB · Views: 262
  • ws9f4.jpg
    ws9f4.jpg
    86.8 KB · Views: 921
THX Gents...:) appreciate.

The another pair of semi-airfoils was done.
 

Attachments

  • ws9f7a.jpg
    ws9f7a.jpg
    73.4 KB · Views: 366
  • ws9f7.jpg
    ws9f7.jpg
    74.7 KB · Views: 242
  • ws9f6.jpg
    ws9f6.jpg
    81.2 KB · Views: 242
  • ws9f5.jpg
    ws9f5.jpg
    98.9 KB · Views: 245
THX Mate. :)

Finally I have attached these another semi-airfoils to the wing halves. Because the central stringer was running at the place where the main spar was going too I added a few parts to it only. At the end all parts were sanded and their fitting was check again. All was fine.
 

Attachments

  • ws9g.jpg
    ws9g.jpg
    88.3 KB · Views: 893
  • ws9g1.jpg
    ws9g1.jpg
    83.6 KB · Views: 348
Great work my friend, and thanks for the explanation. I lost my profile gaugesome years ago, and have been using a similar method too, and sometimes use plasticine, pressed into the area to be measured, which gives an approximate shape from which to make a cardboard template. This is then corrected as required, and used as a pattern for the plastic part.
 
Thank you Terry. Sometimes I use these ways for obtaining shapes as well. Also I use the solder wire for that.But still the cardboard way is one of the best I know.

Having these bottom halves of the wing finished I had a look at these top ones. You might remember there were cavities at areas of aileron bays.
 

Attachments

  • caw1.jpg
    caw1.jpg
    61.4 KB · Views: 218
All cavities there were filled wit CA Superglue.When the filling was hardened I used some Tamiya masking tape for limiting areas of the work. Then sanding it down. Of course I did it to both of top halves.
 

Attachments

  • caw1a.jpg
    caw1a.jpg
    85.1 KB · Views: 244
  • caw1b.jpg
    caw1b.jpg
    74.4 KB · Views: 246
  • caw1c.jpg
    caw1c.jpg
    62.2 KB · Views: 246
  • caw1d.jpg
    caw1d.jpg
    75.7 KB · Views: 244
H~ :D..appreciate

At last I could put the wing halves together.ALso I attached ailerons, the wing cannons and front coverings of their bays.. The next problem has been encountered.One of these front coverings was too flat at its top. As a result both leading edges at these areas looked slightly different. I decided to apply some putty there.
 

Attachments

  • ar2.jpg
    ar2.jpg
    64.4 KB · Views: 240
  • ar1.jpg
    ar1.jpg
    73.7 KB · Views: 244
Very kind words here. Thank you all of you for them.

To finish the wing matter...the applied putty was sanded down and made smooth. The effect below...
 

Attachments

  • ar2a.jpg
    ar2a.jpg
    64.4 KB · Views: 224
  • ar3.jpg
    ar3.jpg
    68.9 KB · Views: 222
  • ar4.jpg
    ar4.jpg
    56.4 KB · Views: 252
  • ar4a.jpg
    ar4a.jpg
    57.7 KB · Views: 230

Users who are viewing this thread

Back