**** DONE: 1/72 PBY-5A Catalina RAAF 42 Sqn - Seaplanes / Floatplanes of WWII

Ad: This forum contains affiliate links to products on Amazon and eBay. More information in Terms and rules

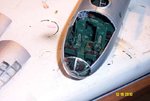
Did tons of stuff in my 1/48 cat a goodly while back Michael (GB eight), internal lighting and all but when she was all closed up, little or nothing could be seen which seemed in general a waste of time and energy, but to me it was great fun rising to each challenge and an even bigger thrill to achieve. So plough on my old friend, do as you wish and fell pride in what you achieve.
 
Last edited:
Please understand no slight was intended. Modeling is indeed about personal pleasure, enjoyment, and skill. Speaking only for my own personal self: If I am going to spend time and effort scratch building something I want it visible. In this build I see an entire tail being rebuilt because it's the wrong shape, exterior scoops being added, mooring cables added, 4,000 individual rivets being drilled, etc. To my way of thinking that is effort well spent. Again, gentlemen, my own personal opinion.
 
Mike, no problems at all my man. You actually make some valid points, and time constraints will dictate the extent of my cockpit sojourn. As i said, I am limiting my add ons to the cockpit area that might be marginally visible from the outside. Even then, as vic points out, it is quite unlikley that much at all of the interior will be visible. a lot will depend on how clear the clear parts really are....if I get someone looking at it, and saying "whats that?" i can say "oh, thats the harness that i knocked together using some aspirin wrapper and some fuse wire I had lying around". i would get a reeal kick out of that

Today is Monday, and yesterday i was on garden detail and ended up being so knackered I didnt do anything on the build. ive got the harness in and complete...a bit rough but okay (buckles are too big and the harness too wide, but that actually helps to hide the silly excuses that are the pilots seats). Ive fabricated the catwalk, and the firewall black boxes some of the ribbing. Have made the centre throttle and trim controls. Need to start putting this stuff on the model, then take it from there....
 
Know all about those garden details Michael, I love my garden but after filling 5 trash paks with clippings, old plants and such in May just gone, I also know the feeling of knackered.
 
Michael, if your cockpit turns out well you might consider using a razor saw to cut open part of the cockpit as I did with the B-29. The very thin razor saw will produce a very thin kerf and the removed piece will fit right back in with only a small visible cut line.
 

Attachments

  • DCP_1459.JPG
    DCP_1459.JPG
    43.9 KB · Views: 94
I was thinking of not sealing the cockpit glazing....make it possible to lift it off and allow people to look into the flight deck area at least.
 
Shouldn't think a removable canopy would be a problem, others do kits with removable panels and such.
 
In our competition, we are pretty flexible Michael, however I would like to see the fitted canopy in place to see you have done the work to make a good 'fit' and then without in your final pics so the internal detail you wish to display can be seen.
 
I did some further work tonite. very slow. i am proceeding carefully. I finished the flight deck sub assembly and glued it in . nice fit. Finished the IP and the separate control panel. Also more or less finished the centralised roof mounted throttle and tab controls that dominate the interior. Their not fitted yet, but they look okay

Ive cut the central hatchway open and made a replacement watertight door. i intend to glue this in in the open position.

photos are now embarrassingly needed i think.

With regard to the canopy, i dont quite understand how i can not glue it in, and then glue it in. If i do a removable canopy, i was thinking of fabricating tiny holding tabs out of some clear plastic sheeting that i have acquired. These tabs would be attached to the inside of the fuselage and then curl around on three side of the canopy to hold it in place. Sort of grab handles if you like, rather like the holding pins of a clutch pencil. I think i will make up a mock up and see if it holds the canopy as tightly to the fuselage as I want it to. All this may come to nothing, im just thinking aloud really.

So far no major stuff ups. Im thinking of copying Vics panel lines treatment, to get lighter finishes to try and simulate some weathering look, but again may not. ive never attemtpoed anything like that and it would be a major step out for me if I did. I might practice this technique a bit on some unfinished (or rather unfinishable) body part of the cannibalised p-38 ive kept to see if i can apply a finish like that
 
With regard to the canopy, i dont quite understand how i can not glue it in, and then glue it in. If i do a removable canopy, i was thinking of fabricating tiny holding tabs out of some clear plastic sheeting that i have acquired. These tabs would be attached to the inside of the fuselage and then curl around on three side of the canopy to hold it in place. Sort of grab handles if you like, rather like the holding pins of a clutch pencil. I think i will make up a mock up and see if it holds the canopy as tightly to the fuselage as I want it to. All this may come to nothing, im just thinking aloud really.

try your holding method for the canopy Michael, it may work, my meaning was to "sit" the canopy in place for final photo's at the end of your build to show it fits correctly (not glued) so you can then easily remove it for viewing.
 
Michael, I'm putting a bit of thought into what your trying to accomplish and taking into consideration the area and events to which your Cat was subjected, I personally would not worry too much about panel line detail. My thoughts say you should just spray your machine whatever dark, almost black colour you intend, then once satisfied, go over the main upper wing and fuselage panel lines with a very sharp, really dark brown colour pencil. For the hull and floats particularly round the waterline use a silver colour pencil to replicate chipping and wear. Seal this in with an overspray of future or something similar. I would then follow through with the decal process, a nice shiny surface where you want to apply them. Let all this settle and then make up or get a very dark grey and with the airbrush from a great distance, give the aircraft a very, very light and quick well diluted overspray, just to lighten the blackish tone and give an effect of fading. After the first spray has dried and settled, study the outcome and see if some areas particularly on upper wing and other upper surfaces would benefit from another light distance spray to effect better shading and ware. this should also have the same effect on the applied decals, giving them a faded, worn out look.
 
great advice Vic. You describe almost exactly what I want to achieve.....


Lets see if Im good to actually doing this.

Have to go to the circus tonite with the young fella, but bad weather this weekend so garden detail is unlikley. A good opportunity should arise for some progress photos i think. i finally have some worthwhile progress to show the world. looking forward to it.
 
Ive attached transparent plastic holding TABs on one fuelage halves. Basically they are little plastic panels glued to the cockpit sides and sticking out about 1.5mm to provide a holding mechanism for the cockpit. ive curved felxible clear plastic sheets that will have the effect of both supporting the canopy, but also, by virtue of the curving in the plastic should be able to hold the canopy rigidly in place. it might work. looks pretty good and Im hopeful this hairbrained idea of mine might actually work. Have to attach the TABs for the other half then temporarily (ie tape) the two halves to see if the removable canopy idea actually works .

If it does, i will be able to show off the cockpit innards a lot more clearly than if the canopy was sealed and shut, but the canopy will still be in place with a resonably rigid tight fit. heres hoping it works.
 
Michael, I forgot to mention that after you have applied the decals, give the whole model another good dose of future to protect the decals and let it dry thoroughly, like a whole day before the overspray of the thinned dark greyish colour.

Enjoy the circus the little fellow. How old is he now, if memory serves you were at Bungendore when he was born. Apologies if I've got that wrong.
 

Users who are viewing this thread

Back