**** DONE: 1/72 PBY-5A Catalina RAAF 42 Sqn - Seaplanes / Floatplanes of WWII

Ad: This forum contains affiliate links to products on Amazon and eBay. More information in Terms and rules

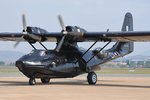
Yeah, if I can get it out here in the back blocks. ive put the main landing gear subassemblies together sanded out all the injection marks from the hull halves and applied the cockpit green to the interior.

I have two questions at this point. What colour to paint the wheel wells, ad what colour to paint the landing gear struts. AQnyone have information on that? i expect RAAF Black Cats were finished similar to contemporary US Black cats
 
Caption says "Rare color photo of a Black Cat." The wheel well looks very dark. I'll see what else I can dig up.

michael.JPG


Geo

michael.JPG
 
Last edited:
Thanks George, much appreciated. I think the wheel bays are the same colour as the fuselage, but that grainy colour shot seems to show the oleos as being unpainted metal colour
 
I found this image at ADF Serials, which suggests black wheel wells and black undercarriage struts as well. Makes painting easier at least.

Some sources suggest that late RAAF PBYs had their wheels removed and the bays plated over. but ive found several contemporary photos of aircraft either side of A24-96 sequence wise that have undercarriage retained. im pretty sure this claim is bogus now

ADF-Serials Image Gallery :: HARS Catalina displayed as A24-362 :: Catalina_A24_362_September_2010_12
 
Tend to agree with others Michael, don't go black but use an off black. Having said this, the RAAF Black Cats were certainly susceptible to fading from the sun and salt spray. As for the wheel well, most references of modern day refurbishment seem to point to this colour being the same in the bay as on the aircraft.
 
Thanks guys, I visited the local hobby shop today, and was dismayed to find no suitable black substitute. They do normally stock Nato Black, and agree that it would be perfect for what i need to do, but alas, are out of stock and wont be receiving any replacement before September. They suggested using RLM grey, and sparingly adding som matt black to the mix, a drop at a time, until i get the off black tonation Im looking for. I think i will give this a try......

I assembled the flight deck, such as it is. Details are woefully sketchy and I was very tempted to scratch build an interior, but in the finish ive settled for cutting a hatch in the forward bulkhead and then fabricating a watertight door hal open . Thats all that could be seen from the outside really. I might add a few elements to the cockpit itself, but these elements, if I do them, would be completely scratch built. The focus of this build for me is to get the basics right, not mess about adding details that take me away from the primary objective. .

The pilots and copilots seats are woeful in this kit and completely out of scale. Ive fitted them to the sub assembly, but now i wished I hadnt. These seats are going to let me down in a big way. I am considering putting a spare two crew figures into the model, to cover these woeful excuses provided by academy.

Apart from that, though the build is going together fairly well. I will post some pics in a day or so .
 
The Cat at HARS................... need detail shots?????
 

Attachments

  • CBR9.jpg
    CBR9.jpg
    90.8 KB · Views: 205
Hi Michael

You may find this story of interest which appeared in the book "Cats At War" by Coral Gaunt and Robert Cleworth.

It's the story of the last flight and sinking of 96 as told by the navigator.

Cheers

Peter
 

Attachments

  • A24-96 story small.pdf
    1.2 MB · Views: 143
Thanks peter, it was an interesting and helpful read.

At the moment i am edging closer to the point where I can show some photos. but first Im scratch building bits and pieces of the flight deck to try and lessen its absolute lack detail. im building this stuff from scrap basically but Im putting each sub assembly together as a separate element. I havent actually attacjed anything yet, but at the moment Im working on:

1) aircrew safety harness which Im making from 8A fuse wire (the buckles) and strips of aspirin packaging.
2) trying to make the proportions of the seating more in scale by making back rest extensions out of styrene blocks, gluing them to the top of the existing seats and then filling the gap with liquid filler, before painting. ive made the blocks up, and dry fitted them, but i havent actually glued them in yet.
3) Some additional controls and 'black boxes particularly for the rear firewall. These are rectangular metal boxes about the size pf a shoe box. ive found some aluminum square section that I can seal at both ends , use a pin vice to drill the holes for gauges and then fill and paint the holes as dials.
4) Putting in sunken catwalk that goes between the pilot and copilot. This is meant to be grated .....I have some mesh patter panel left over from my WQessex build and might use that
5) Roof mounted throttle controls. These are tricky, and Im still not sure about what ive built. I might post them for people to have a look at before fitting, to get your opinions once they are finished
6) Some dash mounted details basically black boxes and gauges not provided and featuring very prominently in the cockpit walk arounds ive been using

There are plenty of other details I could attempt, but i dont want to get too far out of hand with this. Scratch building is a difficult process when you are basically using scrap to do it. I enjoy doing it, but I think it can get out of hand sometimes.

The kit gives two options for the front turret, a single gun "early version" and a dual gun "later version". Ive not been able to definately establish if A24-96 has one or two guns in its bow turret, but most of the aircraft with registration that close in sequence do have the later war turret configuration.
 
No, Take...............
I need to go down to HARS soon as I may be going in for shoulder surgery and need to take care of a couple of things.
So shooting a few pics is a no-brainer..........
 
Michael, my 2 cents: what you are doing is absolutely fantastic no doubt and if you enjoy doing it that's another big plus. As I have posted before: Is any of this going to be visable with the kit together? My own personal opinion is that it is a lot of time and effort to get buried within the kit never to be seen again.
 
Im only doing stuff that if you picked up my model and studied it intently for five minutes you might get a glimpse of the internals stuff. Thats the brief at the moment, at least.
 

Users who are viewing this thread

Back