**** DONE: 1/72 PBY-5A Catalina RAAF 42 Sqn - Seaplanes / Floatplanes of WWII

Ad: This forum contains affiliate links to products on Amazon and eBay. More information in Terms and rules

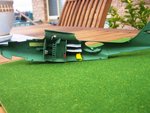
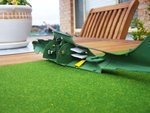
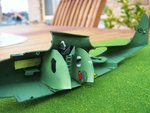
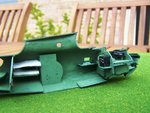
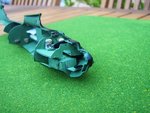
Though it might be difficult in your scale(or not), I've read about mixing white glue with water, wetting a tissue with said substance, draping it over a former until dry and then cutting to final shape. I've never used the process but have seen some very nice results in model magazines, ie; tarpaulins draped over uncovered engines and covers for tank storage bins.

Geo

Now that sound feasible George though one would have to smooth the tissue fibre down for a bed sheet. Worth a try though Michael.
 
The attached photo shows what it should look like.

I have another hair brained scheme which I will try out. The bunk is really just a flat piece of white styrene sheeting cut to size. To emulate the canvas/bed linen effect, Ive been looking around for a material that might emulate that folded look at 1/72 scale. you guys are going to get a laugh out of thjis, but what the heck. You know that paper that is lined with alfoil. they use in those packet soup sachets and the like. Im thinking of cutting that to size and wrapping my bit of stryene sheet in the stuff to emulate the bedsheet look.

Might work. Worth a try I think. The material has the right "fluffed look and its so out there it might just work.
 

Attachments

  • port-10[1].jpg
    port-10[1].jpg
    93.1 KB · Views: 111
Its working so far, though as always when i go back and look at the close up shots, they make me cringe a bit. Getting the perfect finishes is hard, but its something to aim for I guess.

Since last weekends photos Ive just about got the basic internal layout finished. Ive put in the CP for the bow, added the deck catwalks, put in the bunks, The galley has the main shapes put in place, but ive yet to fit the water and metho tanks and cookers. Ive also yet to put the bedding on the bunks, fire extinguishers, life rafts and equipment puches that are allover the interior. I have to put in the engineers IP though Ive made it up.

Before i add all the colourful do-dads, I want to get the existing layouts painted in the the cockpit green. Ive sanded off some of the lumpy daggs that ha arrived and show up in the last set of shots, but Im under no illusions, they are still there, and probably will have to stay there...just slightly less prominently. I will paint small things like the fire extinguishers off the model before attachment. The galley cookers I have cut from some aluminium tubing, so they should look pretty cool

this weekend i might actually get the internals finished and be able to put the two halves together. If not this weekend, maybe next. Cold weather is uncomfortable, have heater in the shed, but its still cold.

This stuff is cool to do, but it wont be visible after I button it all up. If the internal fitout works, I intend to take a couple of competition shots and enter them as extras in the finished entry.
 
Michael, in all seriousness, have you looked into doll houses? They have all kinds of scale furnishings. MANY years ago I built my daughters a Victorian doll house. We found wallpaper/carpets/curtains and beds, all to scale There were even wall light switches and electric lights. Perhaps you could find actual blankets, bedding, pillows, etc.
 
I

Cold weather is uncomfortable, have heater in the shed, but its still cold.

because I like it and change!, here 28 degrees is a cool day for this time and until the paint dries very soon.

your encouragement that you have almost finished and I hope to see pictures soon.
 
these are the progress shots for the week. inching forward, with some further progress to the interior. Worked out a good way to make the fire extinguishers, and made the bunnks up with rather less satisfactory result. i also fabricated the prop de-icing tank in the engineer space using some aluminium tbing and making the lid out of alfoil from an aspirin blister pack. ...pretty happy with that. also the yellow life raft, but put it up against the forward fire wall, instead of the rear wall. oops. Made up some map pouches sort of okay attached the nose weights (need dome tidying of the paintwork up in that area). ive got to yet make up two more extinguishers, one for the navigators space and one on the flight deck fire wall. Currently Im working on the Bombardiers IP. im experimenting with a new method here. Have drilled some small holes in a styrene backing board, painted the board black, as usual. Im want to simulate the dials by using metallic rod (aluminium) that in the test runs worked okay. Another experiment, but at this scale, i have absolutely no luck trying to paint the IPs. I cant even see the dials they are that small
 

Attachments

  • 102_2918.jpg
    102_2918.jpg
    90.4 KB · Views: 75
  • 102_2919.jpg
    102_2919.jpg
    81.2 KB · Views: 69
  • 102_2920.jpg
    102_2920.jpg
    82.8 KB · Views: 69
  • 102_2921.jpg
    102_2921.jpg
    85.2 KB · Views: 73
  • 102_2923.jpg
    102_2923.jpg
    96.7 KB · Views: 74
  • 102_2924.jpg
    102_2924.jpg
    87.4 KB · Views: 75
still working at the moment, if a little slowly. Fabricated ammunition ready use racks for the rear gunnery blisters, and might do the same for the forward position. Fabricated two new crew seats for the navigators/radio operators positions. Fabricated and installed bomb sights and attached my new IP in the same location. Made up some map pouches for the navigators room. attached the final two fire extinguishers installed the control column yokes on the flight deck . I attached control boxes in the rear bulkhead of the navigators room (according to the cutaway drawings i have) that control the float positions. There were also some switches on the other side of this bulkhead, the purpose of which i am unsure of, which i simulated and attached. I also placed a de-icing apparatus in this area. I also installed the MGs to the firing positions in the aft area, but still need to do the turret for the front. ive worked out that for this bird, the forward turret was the twin version so should now be able to complete that subassembly . i have to attach the turret before joining the two halves which will be interesting. Never done a turret before. protecting it from overspary will be difficult. i plan to mask it and paint the framing and then, rather than removing the panel masking, just leave it in place until Im done with the rest of the build and paint.

getting pretty close to finishing the internals. Will be ready to take my final shots and should be able to join the two halves this weekend. im pretty happy with the way the scatch building of the interior has worked out, though it was a lot of work that wont be seen much after I button it all up
 
No picture, will try to rectify that later this week, but the innards are basically done. At the moment Im masking up the turrets and cockpit canopy should be ready by the end of the week. Hopefully progress will speed up from there I am very aware of the Seiran entry that ive done nothing on so far......
 

Users who are viewing this thread

Back