**** DONE: 1/72 Revell SR-71 Blackbird 17978, Playboy Bunny

Ad: This forum contains affiliate links to products on Amazon and eBay. More information in Terms and rules

Stand well back when you do! Depending on the resin, what you are doing is making an explosive substance! Don't worry though, it'll need an initiator and det set to make it go bang. Unless it's unstable of course..........
 
I wonder how it effects resin.

:hotsun: :hotsun:

I found out the hard way. I got a second hand SBD3 dauntless that already had a resin cockpit installed and painted, but the previious owner had made a total hash of it. After getting the resin parts out of the cockpit (no mean feat in itself as this was BEFORE I found out about CA Debonders), I figured the fastest way to remove the paint on it was simply dip the parts into nail polish remover. BAD idea. The paint did come loose but the acetone ended up softening the resin until it was pliable like rubber. Pitched the resin parts into the trash.
 
Hey guys I'm back from vacation and ready to start building again... Well maybe tomorrow? :oops: The only problem is I'm back without my camera. My two year old Daughter Delaney was playing with it and dropped it on the lens. Its toast! The build will continue but the progress shots are out of the question for who knows how long. :(
 
Not a lot to show here but this should bring everyone up to speed.

Installing the two 34,00 pound thrust Pratt Whitney JT11D-20 (Military designation J58 ) afterburning turbo-ramjet engines. The real engines measured 20 feet long, 4.5 feet in diameter and 6500 pounds in weight. The early J-58s produced 30,000 pounds of thrust while the later versions were rated at 34,000 pounds. They operated in continuous afterburning during cruse flight.

IMG_0092.jpg


This is where the engines were housed in the aircraft. Talk about impressive.

SR-71tophingednacells.png


Here the tail assembly was installed

IMG_0093.jpg


Next the vertical fins were put in place and set to the correct angle.

IMG_0094.jpg


IMG_0095.jpg


Next I installed the Advanced Synthetic Aperture Radar (ASAR) nose. The nose usually housed the OBC (Optical Bar Camera) which was capable of photographing 100.000 square miles of territory per hour.

IMG_0096.jpg


IMG_0100.jpg


next step is to prime the aircraft

IMG_0108.jpg


I was at a stopping point and decided to assemble the GTD-21 Drone. While I don't plan on attaching it to the aircraft I figured what the heck. To the best of my knowledge information on these drones is still classified as top secret.

IMG_0098.jpg
 
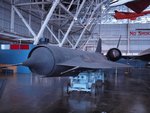
Looking great Dirk! I took this picture of the drone last winter at the Airforce Museum. Maybe you could make up a cart like that for it and display it next to the SR-71
 

Attachments

  • P2110187.JPG
    P2110187.JPG
    114.5 KB · Views: 141
Coming on nicely Dirk, and great pic of the engine bay.
Land on a carrier? It would have to be a loooooooonnnnnnngggggg carrier !!
 

Users who are viewing this thread

Back