**** DONE: Beaufighter Mk 1F 219 Sqn RAF (1 Viewer)

Ad: This forum contains affiliate links to products on Amazon and eBay. More information in Terms and rules

jamierd

Senior Airman
556
0
Jul 16, 2009
Glenrothes Scotland
username-jamierd
name -jamie
category-3 beginner
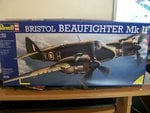
manufacturer- Revell
scale-1/32
accessories-Quickboost exhausts,home made decals,some scratch building


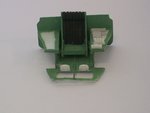
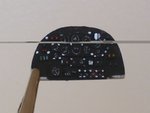
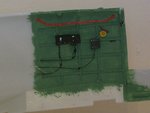
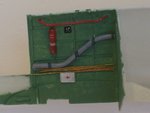
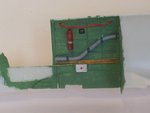
on 25th october 1940 Beaufighter R2097 flown by Sgt hogkinson+sgt Benn claimed the first of 11 kills in Beaufighters and the first ever kill by a Beaufighter, aircraft was coded FK_ still searching for that last letter although i am told its possible the aircraft was not marked with codes yet.I am going to make my first attempt at scratch building though not to the extent Airframes went with his Beau in the earlier group build.The kit itself is very easy only 85 or so parts. so i am going to attempt to improve the cockpit a little possibly a few other little bits to will deal with them as i come to them though .
 

Attachments

  • 100_0892.JPG
    100_0892.JPG
    87.1 KB · Views: 243
Last edited:
Nice one Jamie, and BIG!!
its all part of my plan fill the house with big models and move the kids into the garden shed models dont make half as much noise
I wish I could get away with that! My son's bedroom use to be my model room before he came along and I was exiled to the back porch to sweet in the summer and freeze in the winter!
 
I have a great thing going on here as terry has already done this kit everything i need to know is on his thread at least as far as scratch building goes anyway
 
Nice one Jamie. The kit goes together well and, considering its age, is rather good. It'll be nice to see the early night fighter in this scale mate, and if you need any help/references etc, just shout.
As long as you change the bulkhead position in the cockpit, you can get away with minimal detailing and it'll look sound, especially if the canopy roof is closed.
I'd need to check, but I think even these early aircraft had the 'porcupine' exhausts, and the 'Quickboost' sets (two types, short and long) are excellent, and great value for money.
 
my exhausts have just arrived they look good.which way am i moving the bulkhead and how far lol. i have got hold of 5 books so far
Beaufighter in action squadron signal
Beaufighter aces of WWII airaces
Bristol Beaufighter camoflage and markings
Beaufighter12 profile
The bristol beaufighter sam modellers datafile
 
That last book is a great reference, although I only have some pages Jan sent me. I'll need to have a look at the instruction sheet, but from what I remember, the bulkhead up front needs to be moved further back at least, even if the entrance well isn't modelled. Also, the bulkheads in the Observer's station didn't exist - this was open. Have a look at the pics of the internal fittings on my model, to give you an idea of what's needed, and if you need more info, just ask.
 
Yep, the half bulkhead comes up to just below the top of the pilot's seat. The main bulkhead, with the armour-plated doors, is in line with the first (forward) fuselage transit joint, which is moulded on the outside of the fuselage halves. If you decide to add any internal detail in the rear fuselage, note that the Mk1 didn't have the ammo tanks for the cannons, as in my model. The guns were drum fed (each weighing 60 pounds !), with the drums being loaded onto each cannon through the floor (or lack of !). Extra magazine drums were stored on the sides of the fuselage, and were changed by the Observer.
To be honest, unless the rear upper escape hatch is open, not much can be seen of the interior, especially looking forward, and if the forward bulkhead doors are closed (as they are on the kit part), no light gets through to the mid-section anyway, so you can get away with a lot - or more correctly, with nothing !
 
well here is my first real attempt at scratch building many thanks to airframes for his earlier masterclass
 

Attachments

  • 100_0919.JPG
    100_0919.JPG
    42 KB · Views: 190
  • 100_0916.JPG
    100_0916.JPG
    51.4 KB · Views: 178
  • 100_0913.JPG
    100_0913.JPG
    60.1 KB · Views: 178
  • 100_0910.JPG
    100_0910.JPG
    56.3 KB · Views: 175
  • 100_0909.JPG
    100_0909.JPG
    51.8 KB · Views: 187
Great stuff Jamie ! Just the rear section to do now then ! With the rear hatch closed, and the seat facing aft, not much can be seen of the inside, so it should make life easier -- I think about 70% of my build was taken up with the bl**dy interior !!
 

Users who are viewing this thread

Back