A4K
Brigadier General
Great work Terry!
Follow along with the video below to see how to install our site as a web app on your home screen.
Note: This feature may not be available in some browsers.
Ad: This forum contains affiliate links to products on Amazon and eBay. More information in Terms and rules

Thanks Vic and Alex.
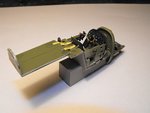
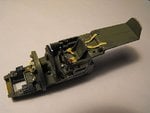
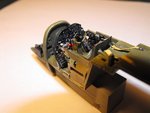
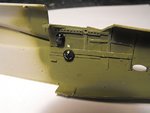
Vic, the seat straps were made from strips of foil from the packaging off my pain killers! It's thicker than kitchen aluminium foil, and conforms well. Lead foil from the necks of wine bottles is ideal for this, but I've run out of it. Just cut to the width and length required, using a scalpel, and shape the fastening lugs and mounting plates the same way. Punch the holes for the locking lugs, then paint. When the paint is dry, the buckles can be scratched in, or painted on, but normally I add the loop of the adjusting strap, and the buckles, from more foil. Couldn't be bothered this time!
They don't look as realistic as the commercially available PE belts, but they're good enough in most cases - and they cost nothing!!