*** DONE Italeri 1/48th scale Boston IIIA Group Build.

Ad: This forum contains affiliate links to products on Amazon and eBay. More information in Terms and rules

Thanks guys. It's been a straightforward build, OOB so far, apart from a bit of cutting, minimal scratch-building and the seat belts. The overall fit of parts on this kit is very good indeed, possibly one of the best I've seen, so that's speeded up things a bit. I've now lightly sanded the fuselage joints and re-scribed where required, and the wings and empannage are in place. A very small amount of filler will be required on the starboard underside of the main wing joint, and around the port side of the base of the fin and the tailplane joint, and I reckon I'll just use 'porridge' for this.
The next stage involves fitting the main landing gear and engine nacelles, before moving on to some detail work around the engines and the cowlings. I'd hope to be able to fit the landing gear after painting the model, but the shape of the gear wells preventsd this being done without great difficulty.
PIC 1. Is the small gap under the starboard wing - nothing serious.
PIC 2 .The area around the empannage needing some attention, again nothing major. As you can see, some sanding has already been undertaken.
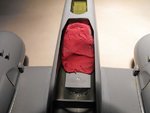
PIC 3. How it looks on the underside. The bomb bay will be packed with lead in the forward section, to keep the nose down, and the doors fitted in the closed position. Some plastic tabs will be glued inside the fuselage to help 'seat' the doors correctly, as the moulded frame holding the bombs, which also acts as a locating platform, will be omitted. This is the only weak part of the kit, the way the bomb bay representation is simplified, but again, not a problem to scratch-build if required.Just visible in this shot, to the rear of the open bomb bay, is the shape of the ventral 'tunnel' gun hatch.
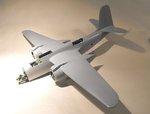
PIC 4. How the model looks so far, taking on the recognizable shape of the big-tailed Boston.
Thanks again for your kind comments, and I'll post some more pics soon, after I finish off the Beaufighter for the MTO build.
 

Attachments

  • Bombers Build 057.jpg
    Bombers Build 057.jpg
    55 KB · Views: 107
  • Bombers Build 058.jpg
    Bombers Build 058.jpg
    45 KB · Views: 99
  • Bombers Build 056.jpg
    Bombers Build 056.jpg
    36.4 KB · Views: 107
  • Bombers Build 054.jpg
    Bombers Build 054.jpg
    36.1 KB · Views: 105
Thanks Daniel, Vic and Evan. It hasn't been that quick really, as around 35 hours or more have been spent on the build so far, at least 75% of which was on the cutting and the interior. The parts fit is so good, that the rest seemed to fall together.
 
Thanks guys. I should get some more done today, whilst waiting for the base for the Beaufighter to set. I'll post some pics later.
 
Thanks Wayne!
Didn't get any more done to the base for the Beaufighter. I needed to do the basic covering, with sand, outside, and just as I was about to start, the heavens opened again! Drat!
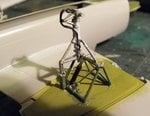
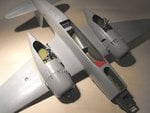
So, at least I got a lot more done to the Boston. The main landing gear legs have been fitted, with some additional struts from plastic rod, and have now been painted and the engine nacelles fitted around them. Don't why I bothered adding extras, most of the gear will be hidden in the wells, or covered by the doors!
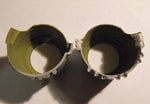
The stub uxhausts have been drilled out, and the rear of the cowlings thinned, with the grouped exhaust pipes added from plastic rod, which was drilled out and then painted in a base colour. These will be painted properly after the model has been sprayed and clear coated. If I hadn't had some excellent material sent to me by Paul (Micdrow), I wouldn't have been able to add these details - but they are all shown in great detail in an actual Boston Servicing Manual which Paul sent me! Thanks again Paul - I now know how to assmble, service and dismantle a Boston!!
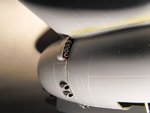
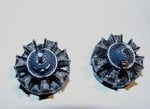
The engines have also been assenbled, painted and fitted, and it was here that I found the only real niggle with the kit so far. The engines just push into the cowlings, and there are no locating or alignment lugs, which means that extreme care has to be taken to align the engines the right way up,and straight, and hold them in place until glued. Anyone unfamiliar with the Boston or its engines could very easily make a mistake here. Also, although the engine cowlngs and carb intakes fitted perfectly in a dry run, once the engines were inside them they sat slightly forward at the upper edges of the cowlings, leaving slight gaps. The intakes also pop out of line, and some filing and sanding has been required, with a little filler yet to be applied.
It was very evident that the model would be a tail-sitter unless a lot of weight was added up front, which was a bit of a problem due to the clear nose. However, by cutting some lead roof flashing into small squares and strips, I was able to pack this down alongside the nose wheel well on either side of the fuselage, and up into the void behind the cockpit, gaining access through the bomb bay. With a chunk of Plasticine modelling clay moulded in place around the lead, it's now firmly in place and doing the job. The model now weighs a bit though!
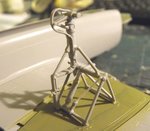
PICS 1 and 2 Show the main landing gear before and after painting. Some tidying and detail painting has since been done - waste of time!
PIC 3. Shows the moulded-in exhaust stubs at left, and the drilled out example, with the thinned cowling walls and plastic rod exhaust groups at right, the latter yet to be sanded and cleaned here. Note the different arrangement between Port and Starboard exhausts.
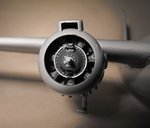
PIC 4.. The engines are as provided, and only painted and a wash applied.
PIC 5. The cowlings and exhausts in place on the nacelles.
PIC 6. How the engines look in situ. Good enough without adding any extra detail, which wouldn't be seen anyway, especially with the props in place. Note the slight gap at the bottom of the carb intake. I think the latter is a lttle too angular, and could possibly benefit from having the top edges rounded off a little more.
PIC 7. Where the lead is! There is no mention in the instructions at all of having to add weight, although experienced modellers would obviously realise it's needed. But, it would still be possible to model the bomb bay open, if the weight was planned and distributed around the front gear well and the space behind the cockpit, above the bomb bay. There is a lot of weight packed in there, and it's needed!
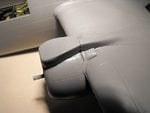
PIC 8. This is the area around the cowling joint, and the separately supplied carb intake. Some filing and sanding has already been dione, and the next stage will see some filler smoothed over the required areas.
PICS 9 and 10 General upper and lower views of how the model looks so far.
Once all the sanding has been done, the scratched or blemished areas will be polished, and the model cleaned. Then, it's back to some detail work, with the scratch-building of the fittings for the glazing and shell for the Nav/Bomb aimers nose compartment. This will include fitting a small, vertical instrument panel to the port side of the glazing, along with the associated wiring and 'plumbing', and the fitting of the Course Setting bombsight and mounting brackets, all of which I have yet to make. Once the nose compartment has been married to the fuselage, then a few other parts can be added, before the first stage of painting commences. But that's some way off yet.
Thanks again for your interest and kind comments.
 

Attachments

  • Bombers Build 087.jpg
    Bombers Build 087.jpg
    24.4 KB · Views: 110
  • Bombers Build 086.jpg
    Bombers Build 086.jpg
    40.9 KB · Views: 130
  • Bombers Build 075.jpg
    Bombers Build 075.jpg
    27.5 KB · Views: 106
  • Bombers Build 071.jpg
    Bombers Build 071.jpg
    42.2 KB · Views: 104
  • Bombers Build 069.jpg
    Bombers Build 069.jpg
    44.4 KB · Views: 105
  • Bombers Build 089.jpg
    Bombers Build 089.jpg
    30.5 KB · Views: 103
  • Bombers Build 088.jpg
    Bombers Build 088.jpg
    39.6 KB · Views: 105
  • Bombers Build 091.jpg
    Bombers Build 091.jpg
    32.2 KB · Views: 102
  • Bombers Build 100.jpg
    Bombers Build 100.jpg
    34.7 KB · Views: 106
  • Bombers Build 090.jpg
    Bombers Build 090.jpg
    24.5 KB · Views: 117

Users who are viewing this thread

Back