Catch22
Major
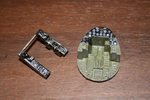
I'll just confirm again, yes, the panel's black. I can never get those stupid decals to work!
Follow along with the video below to see how to install our site as a web app on your home screen.
Note: This feature may not be available in some browsers.
Ad: This forum contains affiliate links to products on Amazon and eBay. More information in Terms and rules
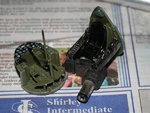
Oh F***
Don't tell me I just spent all that time getting that paint on those instruments
Been there, done that, and said the exact same thing with gusto!
Still looking pretty sweet though!
I'm not into plastic scale models, but wouldn't a decal softner work better ?
Charles
Doing ok Daniel,
I'll just confirm again, yes, the panel's black. I can never get those stupid decals to work!
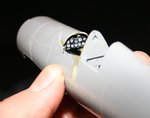
Daniel, sorry about that! When the panel is dry, try to paint the instrument in GLOSS white. Let this totally harden, then overpaint in matt black. When the black is fully dried, carefully scratch some representations of fgures and needles on each instrument, using a pin. You can tape the pin to the butt end of a paint brush, pencil, or similar, to make it easier to handle. It's time consuming, but not as hard as it sounds, and is easier than using a toothpick to dab on white spots. I admit, I haven't used this method for some time, mainly beause I keep forgetting (!), but it works quite well.
](/forum/images/smilies/eusa_wall.gif "Brick wall ](*,)")