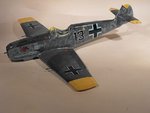
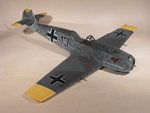
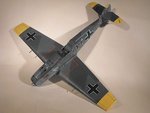
Messerschmitt Makeover.

Ad: This forum contains affiliate links to products on Amazon and eBay. More information in Terms and rules

Great work Terry. Love the new paint job. Looking forward to see it with decals. As far as the new identity of the model goes, you can't go wrong with "13" as Jan would agree I'm sure. :)

I was wondering, how did you manage to disassemble canopy and one of the main landing gear legs without breaking anything?
 
Thanks Dwight and Igor. The main gear leg came out fairly easily, just wiggled it about, like a loose tooth, until I was able to gently prise the joint apart with a scalpel blade. The other leg was firmly fixed, although now, after handling, it's loose and will need to be taken out and re-fixed. The opening section of the canopy is rather delicate, being made up of 38 seoarate pieces (that was a tricky scratch-building job!!), so it was only lightly glued in place and came away with the help of a blade point. The rear glazing was cut along the lengths of the joints, cutting into the hardened cement, and just suddenly popped off!
 
Thank you Alberto, it's progreesing swiftly, so shouldn't be long before it's finished.
I've started on the decals, and so far, I'm fairly pleased with them.
Having checked through my decals files, I realised I didn't have any Balkencruez of the correct style in 1/32nd scale - in fact, I probably had every style except those I needed! So, along with all the other decals needed, I made my own crosses.
These were scanned from an existing decal sheet, re-sized to the required dimensions, and then printed onto white inkjet decal paper. As you all probably know, unless it's an ALPS printer, ordinary PC printers, inkjet or laser, can not print white. So, any design which includes white needs to be made on white decal paper, and then closely trimmed as required. Those decals without white were made by printing on to clear decal sheet, and all the decals were either scanned from artwork re-sized accordingly, or from designs drawn by myself, or typed on the PC.
PIC 1. Shows the fuselage cross and the first stage of the 'Black 13'. The cross was scanned from an existing decal sheet, re-sized, and then trimmed around the periphery. Those areas showing small areas of backing at the edges will be re-touched once the decals have settled and been sealed. The 'Black 13' was made by scanning a 'Black18' decal of the same dimensions, and then editing this, by erasing the left-hand centre section of the '8', using 'Corel Photopaint'. Once sealed, the white outline will be painted-in by hand. The somewhat 'gritty' appearnce of the black characters is due to my being a bit too enthusiastic with the spray can of sealing varnish when making the decals! It isn't as harsh in 'real life', and should smooth out when gloss coated, and after the final semi-matt clear coat is applied. The first three frame numbers are in place, and were made by typing to the smallest font size available, using a typeface as close as possible to the Luftwaffe style, and then reducing the size slightly in the editing programme. These were printed onto clear decal sheet.
[Note that some of the paintwork and panel lines appear a little 'lumpy and bumpy' in some of the close up shots, which is due to the fact that this is the third re-paint of this models' 25 year lifespan. The panel lines will be corrected, and the rest, again, should smooth-out once the clear coats are applied. ]
PIC 2. The Werk Nummer decals, and the lifting point decals held their density well. The swastika is the only commercially produced decal used so far, being from an old Microscale sheet, and is slightly larger than it should be. Sod's law, I found two the correct size once it was too late!
PIC 3. I'm really pleased with the way the 'Tatzelwurm' decal turned out, as I expected this to lose a lot more density, once transferred, than it actually has. This was made by scanning a black and white picture, re-drawing the outline, and then colouring it, before printing onto clear decal sheet. The tongue of the creature will be painted yellow, and the black outline enhanced slightly, once the decal has been sealed. The factory data plate, on the right in this shot, was scanned from a picture of a real plate, and printed onto white decal sheet. Trimming this was a bit tricky!
PIC 4. The crosses for the undersides of the wings were made in the same way as the fuselage crosses, using white decal sheet.
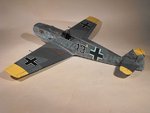
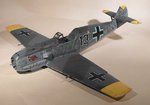
PIC 5. How the model looks so far. There are still a number of decals to apply, and some hand-painting of other markings, before gloss coating and then applying a final semi-matt clear coat. Once this is done, then it'll be time to re-attach the landing gear, and work on the canopy, where the opening section will be adapted from that in the Hasegawa kit. The scratch-built canopy from this model will be used on another 'Emil', in the BoB Group Build.
There's still a fair way to go, but so far, I'm pleased with the way the 'restoration'of this old model is proceeeding. Thanks once again for your continued interest and compliments, and I'll post some more details and pics soon.
 

Attachments

  • Bf109 and Tiffie 066.jpg
    Bf109 and Tiffie 066.jpg
    61.8 KB · Views: 117
  • Bf109 and Tiffie 068.jpg
    Bf109 and Tiffie 068.jpg
    42.1 KB · Views: 118
  • Bf109 and Tiffie 075.jpg
    Bf109 and Tiffie 075.jpg
    47.9 KB · Views: 122
  • Bf109 and Tiffie 073.jpg
    Bf109 and Tiffie 073.jpg
    73.7 KB · Views: 119
  • Bf109 and Tiffie 069.jpg
    Bf109 and Tiffie 069.jpg
    72.7 KB · Views: 117
Thanks very much Darryl, and no probs re the decals. Just shout when you're ready.
 
Thanks a lot guys, it is appreciated. Got the decals finished, and the 'Black 13' outlined in white, although it could be better. I guess the RA is taking it's toll, as fine-line painting is getting harder to do. All the touch up is done, and a few bits of detail painting. I'm just waiting for the sealing gloss coat to harden, before spraying the semi-matt finishing coat, then it's on to the canopy and other detail parts.
I'll post some more pics soon, and thanks again for your interest.
 
Well it's now time to move on to working on the canopy and other bits and pieces, as the model now has it's new 'coat of many colours'. As previously mentioned, I'm not that happy with the white outline around the 'Black 13', as it's nowhere near as tight and neat as I used to be able to achieve. However, as I was painting over an uncertain quality of decal, I used acrylic paint, which certainly didn't 'flow' as easily as enamel, which I normally use for these jobs, and could only be thinned to a point, otherwise the fine brush would just leave streaks. Still, apart from a refurbishment, this is also very much an exercise in techniques and the use of home-produced decals, as a 'pracice' for a couple of 'Emils' for the BoB Group Build and, to that end, the aims have been achieved, and some useful lessons learned.
PIC 1 shows the model after all the decals have been applied, and some of the detail painting, ready for the final clear coat, semi-matt in this cace, for Luftwaffe aircraft.
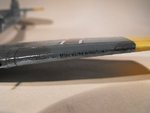
PIC 2. A close-up shot of one of the home-made stencil decals on the leading edge slats.
PICS 3 and 4. The final clear coat on, and the cockpit masking removed.
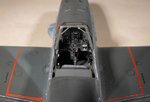
PIC 5. A quick peek into the cockpit, which is virtually all 'out of the box', except for a scratched seat harness, gunsight, canopy grab handles and a couple of knobs and levers.
PICS 6 and 7. General views of how the model looks, with the details of the Tatzelwurm painted in, and some other markings hand-painted.
Once again, thanks for your interest and compliments, and I'll have another update soon.
 

Attachments

  • Bf109 and Tiffie 085.jpg
    Bf109 and Tiffie 085.jpg
    27.7 KB · Views: 94
  • Bf109 and Tiffie 081.jpg
    Bf109 and Tiffie 081.jpg
    39.6 KB · Views: 95
  • Bf109 and Tiffie 080.jpg
    Bf109 and Tiffie 080.jpg
    30 KB · Views: 117
  • Bf109 and Tiffie 078.jpg
    Bf109 and Tiffie 078.jpg
    35.8 KB · Views: 97
  • Bf109 and Tiffie 076.jpg
    Bf109 and Tiffie 076.jpg
    39.1 KB · Views: 93
  • Bf109 and Tiffie 084.jpg
    Bf109 and Tiffie 084.jpg
    40.9 KB · Views: 100
  • Bf109 and Tiffie 089.jpg
    Bf109 and Tiffie 089.jpg
    29.1 KB · Views: 94

Users who are viewing this thread

Back