P-47 'Bridge Buster', 1/48th scale, 9th Air Force Diorama.

Ad: This forum contains affiliate links to products on Amazon and eBay. More information in Terms and rules

Thanks for that on the shisle......
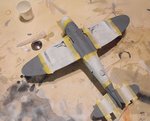
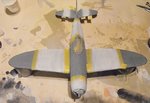
you did address this. My IPMS, or PMS as Annie refers to it, is doing an OOB build and I was told "if it ain't in the box, you can't use it"! Although scratch building is okay but you would have to use the sprue.

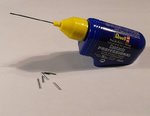
That's how we did it in the old days!
 
Yep, I remember the 'old' rules, where even additional scratch-building work had to be plastic, although a very minimal amount of the then new-fangled white metal was allowed, and maybe the odd sliver of balsa!
Resin, photo-etch ?
That was thought to be some kind of fix, or what you rubbed on a violin bow, and what printed circuits were made from!!

Anyway, I received a couple of sets of cutting discs for my motor tool thingy - diamond, and steel circular saw type - so I was able to successfully cut suitable lengths of stainless steel tube from old Revell cement bottles, to use as guns. The moulded-on plastic guns have been removed from the wings, and holes drilled to accept the tubes, which will be fitted after painting and clear coating etc.
These tubes are exactly right in diameter and, being stainless, are the same as the real .50 cal Brownings fitted to the P-47.
A thee second squirt from these, will give a sticky end to any Focke. (I know, I get worse - and yes, me coat's on and I'm at the door!).
The white areas for the AEAF stripes, and nose, fin and tail plane I.D. bands have been masked and have had the first two coats sprayed on, and another two, or maybe three thin coats will follow, once the first paint has thoroughly dried.
PIC 1. The stainless steel tubes for the guns, cut from a Revell cement bottle.
PICS 2 and 3. The first two thin coats of white. This was a b*gg*r to spray, as yet again, the Humbrol Matt White was like paste, and had to be really thinned to get it to spray at all.
All being well, given the remaining white goes on without any major problems, the next step will be to mask over the white, including cut-out areas for the fuselage code letters, and then spray the Olive Drab, and I hope to get this done, in stages, over the next day or so.
Thanks again for your interest and kind comments, and I'll post more as soon as possible.
 

Attachments

  • P-47 Build 123.jpg
    P-47 Build 123.jpg
    62.1 KB · Views: 142
  • P-47 Build 124.jpg
    P-47 Build 124.jpg
    88.4 KB · Views: 136
  • P-47 Build 125.jpg
    P-47 Build 125.jpg
    100 KB · Views: 146
No worries Brooks. I ws not intending to chastise you so hope yiu did not take it the wrong way. I did have a few wheel well pics and decided I was not going to detail the area anyway. I was a bit confused by the brake lines and linkages on the gear struts and your excellent pics confirm what I picked up from a few other references.


Nope, not taken the wrong way, I just don't get to view these builds like I use to and I don't like it but there is not much that I can do about for a while. Life has gotten in the way but if you guys need anything and I have it just drop me a PM and I will get it to you.

Terry, that's looking excellent sir! Keep up the good work.:thumbright:
 
Resin, photo-etch ?
That was thought to be some kind of fix, or what you rubbed on a violin bow, ....

That would be ROSIN Terry. I know because there is a $500 violin sitting in my son's old bedroom that he doesn't play any more.

Good solution for the guns. I hate painting white and have lots to look forward to on Cleo III. Your's is coming along just fine.
 
Thanks Andy. Don't know about Canada, but in the UK, the block of yellow stuff used on the violin bow is spelled resin, but pronounced rosin.
Which reminds me - I have a roughly three hundred years old violin sitting at my sister's house, rescued from my Dad's place when he passed away, and handed down to me by my Grandmother, when I was 7 years old, which I should retrieve and have valued.
 
No man! It's made from the SAP of a Maple tree. You Smoke the leaves, silly!
And them barrels is the best use of that Revell glue I have seen yet. Throw away the bottle and use the tube, brillliant.
I use Humbrol glue in the yellow bottle.
 
I used to use 'Britfix', which was what it was before Humbrol (or more correctly, Hornby) just called it Humbrol cement, both in tube, and their excellent liquid cement. But I can't seem to get it locally. The Revell stuff is OK ish, but it's in between a liquid cement and a'tube' cement, even though the one shown is supposed to be liquid, available in those nozzle bottles, and in a bottle with a brush.
I also use Plastic Weld, which is more or less MEK, but it evaporates very quickly, and can only really be used along seams and other such joints.
 
Thanks Hugh.
I've got the white done, and the masking removed. Just going to give it a few more hours, then paint the black stripes. Should have something to show tomorrow - Oh, and I think I've finally settled on a subject, from a choice of three!
Two from the 362nd FG and one from the 404th FG. As I only have written info regarding serial and codes for the 404th machine, I'll probably commit to one of the 362nd's aircraft - I have a profile for one, and a photo of the other (wrecked!), so almost certainly the photographed example will be the one - code B8-R.
 
Like Andy, white is a wicked colour to spray, I usually put another light colour underneath usually a pale yellow, it gives the white a bit of body and seemingly a richer look.
 
The first coat is always the worst with white - once that's on, it's just a case of building it up, and resisting the temptation to 'do just a bit more' until it's dried and settled. I find the best way to get a good, solid white finish, is to start with a thin coat or two of matt white, and then the same with gloss white on top.
However, I want to have a contrast between the 'permanent', properly painted white I.D. bands on nose, fin and tail planes, and the temporary, but 'fresher' AEAF stripes.
Consequently, I've deliberately tried to get a somewhat bright, but 'wishy washy' ( a technical term) look on the AEAF stripes, and a 'solid' but slightly bleached look to the I.D. bands. I was hoping to give the latter a thin coat of gloss white, but on opening the tin, I found the bl**dy Humbrol stuff to be worse than the matt white, but this time, instead of a gooey gunge, is was watery p*ss, about as useful as a chocolate teapot!
Hornby might have moved the paint production back to the UK, but it's still absolute cr@p, and not fit for purpose - the original Humbrol people would have kittens if they saw the stuff being turned out under the brand name they built into the best model paints ever produced.
Anyway, I'm just about to mark out and mask for the black stripes, although i don't think I'll get them painted until tomorrow, as my hands and wrists are starting to feel the strain.
More pics just as soon as I have something to show and, given the hands and shoulder behave, I also hope to get back to the Fennec over the weekend, and next week, when everybody will be celebrating Christmas - meaning it'll be quiet, with no interruptions and I can get down to some serious work without people 'phoning, knocking on the door and so on.
Great - as there's b*gg*r all else to do during the week of silliness and expense!
 
And just for clarity's sake, resin is what some of us used to scrape from a smoking device to catch a buzz when there were no, (Ahem), herbs around.
Just sayin'!
Photo-etch? what the hell was that?
We used bits and pieces of brass screen, (also, oddly enough, from "smoking devices") for air intake filters.
A clicker ball point pen has many useful parts to the scratchbuilder!
You can take any common device, smash it up, and I can find usage for most of it in scratching!
There was, (and still is) a satisfaction in hunting out the cool uses for everyday crap and finding a way to put them in a model.
 

Users who are viewing this thread

Back