Scale 1/48th, A-4G Skyhawk, RAN V805 Sqn

Ad: This forum contains affiliate links to products on Amazon and eBay. More information in Terms and rules

Looking good! what size lettering is the '885' ? ,I've got a 1/48 sheet of numbers and serials so if they're the right size I could send some your way


Hi 109

That would be much appreciated, I will PM you my address.

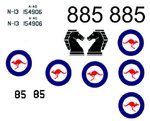
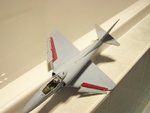
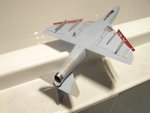
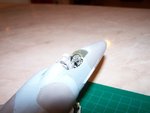
The letters "885" are 0.98 cm high according to the micrometer. I am using 110 pt font, and then scaling down, to get a more dense and sharper image. The "85" letters are 0.56 cm high, and the serials are 0.28 cm


Dont send anything just yet. I have decal sheets arriving tommorow or the day after. I will try and print my own. If I bum out, I might take you up yet.

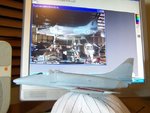
Ive also redone the roundels, because the kit roundels are just not what i want. The kangaroo image looks like the roo is pregnant, and the disc colour is wrong, so I downloaded the right roundels and included them in my decals sheet....A copy of the sheet is attached.

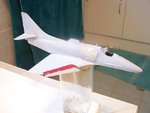
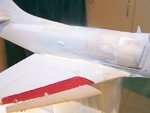
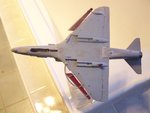
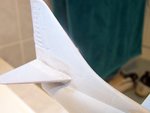
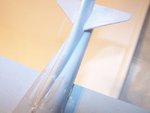
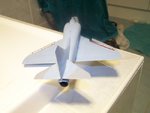
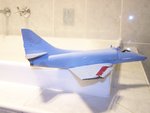
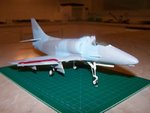
Ive spent the day sanding, sanding and yet more sanding of the fuselage and wing assemlies. I am trying to avoid sanding off outer skin detailing and of course sanding a hole in the skin....but fitting all the pieces so they look like one piece is important I think....I am using 1200 gpi (grains per inch) wet dry emery to do the sanding, except at the moment I am still dry sanding. I will finish the thing with a wet sand at the finish
precise

I am also waiting for a call from the museum to confirm the colour scheme should have an answer by tonight
 

Attachments

  • DECALS for ac 885 post version.jpg
    DECALS for ac 885 post version.jpg
    35.8 KB · Views: 103
The kangaroo image looks like the roo is pregnant

:lol:

checked the serials , they're too small for what your after .Il have a look though for the right size

Hopefully someone else may have the right size going spare?

Good luck with printing the decals , must learn myself how to do that
 
Progress for Day 2 (then I have to get my chores done, or face divorce and/or torture)

I am a bit concerned that I might have overdone the sanding, trying to get panel fits as good as I can. Wings and tail asembly are on and the fuselage is together. I have another problem area in the starboard wing aft....was not a great panel match and lots of putty. So far its obvious that ther is an error as well......wouldnt mind some opnions as to how bad it is, and if so, what I can do about it
 

Attachments

  • Picture 030.jpg
    Picture 030.jpg
    34.1 KB · Views: 112
  • Picture 031.jpg
    Picture 031.jpg
    31.5 KB · Views: 101
  • Picture.jpg
    Picture.jpg
    35.3 KB · Views: 116
  • Picture 032.jpg
    Picture 032.jpg
    27.5 KB · Views: 106
  • Picture 033.jpg
    Picture 033.jpg
    23.1 KB · Views: 102
Hi guys

Had some difficulties in logging on, but eventually got ther. Made some further progress tonite. quick update, photos wil follow

My decal sheets arrived today and I could not resist but to print the artwork that I prepared yesterday. I am very happy, everything is crisp, clear, bright, the right scale and colour, and my flying kangaroo dont look like pregnant ducks anymore

I have started to apply some of the camo layers, but as the photos show, I am concerned now about the colour matches. One of the photos, shows a photo of my model against an image of the actual plane. I think the colours in my model are too pale. I'm not sure if I can do anything about that, or even if I should. When I used the Paintshop colour analyzer to compare the colour of the model to the colour of the museum aircraft, it gave an RGB (Red/Green/Blue) analysis of 198/232/244 for the aircraft grey component of the colour scheme in the museum, and 179/217/228 for my aircraft grey. There is quite a bit of discussion about this difficulty on the net....a lot of people say to get the effect of the museum A-4 a blue wash over the last coat is needed. I'm not sure if I want to risk that, but I might put a semi-gloss veneer over the final coats, which should darken things up just a bit.


Anyway, here are the photos..
 

Attachments

  • Picture 042.jpg
    Picture 042.jpg
    31 KB · Views: 108
  • Picture 040.jpg
    Picture 040.jpg
    26.5 KB · Views: 103
  • Picture 043.jpg
    Picture 043.jpg
    29.2 KB · Views: 97
  • Picture 045.jpg
    Picture 045.jpg
    29.7 KB · Views: 103
  • Picture 046.jpg
    Picture 046.jpg
    62.7 KB · Views: 110
I think its comin out great.... The camo is tough because different lighting makes the colors change.... As for being too pale, a coat of gloss will definatly darken it up as I have personal experience with this....

What I do and many here do is to get the camo done to ur satisfaction, then spray on the gloss coat in preperation for the decals... U want a nice smooth finish for the decals to sit on....

Once the decals go on and set overnight, hit it with the gloss again to seal the decals down... I think this is where ur gonna wanna be as far as getting the color to match up...

As an extra bit of advice, start out spraying the gloss on a piece of scrap/extra to see how it flows.... Start out with a nice light coat, let dry and hit it alittle bit heavier... Im not an expert at the gloss gimmick and its always a trial for me to get it right, but when it does go right it really makes a difference to the coloring...
 
Looks good to me! It's virtually impossible to obtain a true colour, or colour temperature match, by comparing tones from images, electronic or photographic, as there are so many variables. These include the original source lighting, the printing process, and, of course, differences in computer monitor resolution, brightness and contrast. The only way to get a true reading is from the original paint surface itself. Added to this, is the light source under which the model itself is being viewed. Only fairly bright daylight, or a 'daylight simulation' light bulb will give a true rendition, especially when photographed, although many digital cameras can cope to a reasonable extent, if the white balance is adjusted accordingly, and test shots made to correct as required.
I agree with Dan regarding the gloss coat. To obtain a perfect surface for decals, it's best to apply a good, smooth, clear gloss coat to the model. When the decals have been applied, thoroughly set, and the model cleaned of any decal adhesive residue or softner/setting agent marks, then a further clear gloss coat should be applied, which not only sealds the decals, but also provides an even tonal appearnce. These coats will have the effet of not only sharpening the paintwork demarcations, but, by diffusing the light, will also darken the tones and colours slightly. Finally, depending on the finish of the actual aircraft, a 'scale' finish should be applied, in clear gloss, matt or semi matt. This again will slightly darken the overall effect and, at the end of the day, if it looks right, it is right!
I personally feel that there is too much b*ll*cks talked about 'correct' colours - very often, on a flight line, even with modern aircraft finished in 'high tech' coatings, variations in overall tone and colour can be observed, and that's before any 'weathering' effects are considered.
So far, your model looks great, and, when finished, the main thing is, if it looks good and acceptable to you, then your aim has been axchieved.
 
progress report for today.

Applying the grey element of the schem has brought the blue element of the aircraft grey (the lighter colour) out better. I think Dan is right, once I get the clear coat on the colour should come out much better.

I have a question. Should i apply the clear veneer now, before putting the ordinance on the underside. At the moment I have a relatively clear model, which will make spraying easier. I can spray the bombs and fuel tanks separately, or as a second coat if necessary???

Wildcat, those PDFs were a great help, thanks very much.

Anyway her are the pics
 

Attachments

  • Picture 050.jpg
    Picture 050.jpg
    42.4 KB · Views: 78
  • Picture 052.jpg
    Picture 052.jpg
    28.8 KB · Views: 88
  • Picture 053.jpg
    Picture 053.jpg
    38.8 KB · Views: 84
  • Picture 055.jpg
    Picture 055.jpg
    44.5 KB · Views: 84
I agree with Dan. It looks great, and, as a rule of thumb, any 'dangly bits', including landing gear, ordnance, antenna etc, go on after the model has been gloss coated, decaled and given the final clear coat, matt, semi-matt or whatever.
 

Users who are viewing this thread

Back