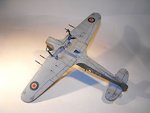
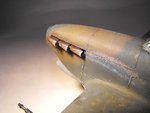
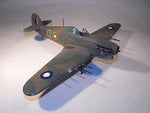
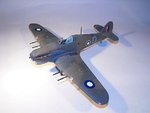
looks great Dogsbody, will you ever be able to depict a "clean" aircraft again ? 
Navigation
Install the app
How to install the app on iOS
Follow along with the video below to see how to install our site as a web app on your home screen.
Note: This feature may not be available in some browsers.
More options
You are using an out of date browser. It may not display this or other websites correctly.
You should upgrade or use an alternative browser.
You should upgrade or use an alternative browser.
1/48th scale Hurricane MkIIc, 136 Sqn, India, 1943.
- Thread starter Airframes
- Start date
Ad: This forum contains affiliate links to products on Amazon and eBay. More information in Terms and rules
More options
Who Replied?Crimea_River
Marshal
No, and he shouldn't if it's a warbird. They look way better this way.
- Thread starter
- #223
Airframes
Benevolens Magister
Thanks guys. Still a lot to do yet Wayne, and then the display base to make.
On the subject of 'dirty' aircraft, when I painted the Mosquito in the 'Shell House Raid' painting, I tried to make it look at least a little weathered. One of the first comments made by Ted Sismore (lead navigator on the raid) when he saw the picture was along the lines of '"Excellent - but a bit too clean"!
On the subject of 'dirty' aircraft, when I painted the Mosquito in the 'Shell House Raid' painting, I tried to make it look at least a little weathered. One of the first comments made by Ted Sismore (lead navigator on the raid) when he saw the picture was along the lines of '"Excellent - but a bit too clean"!
I Second that!!
- Thread starter
- #228
Airframes
Benevolens Magister
Thanks very much indeed chaps! Haven't got any more done today, but hope to have some more progress pics by tomorrow.
- Thread starter
- #229
Airframes
Benevolens Magister
All markings are now complete, the matt clear coat is on, the masking has been removed from the lamps and wheel bay, and the exhausts, gun sight and windscreen are in place. Just about ready to start on the remainder of the construction and detailing.
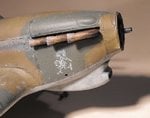
PIC 1. Shows the exhausts painted, stained and fitted.
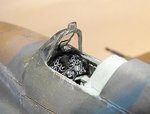
PIC 2. The gun sight was adapted from a clear part from the spares box, with the reflector screen from a piece of clear sheet. The kit's canopy had the windscreen removed with the aid of a razor saw, and this has been fitted after painting the internal frames. Once it's totally set, the joints will be sealed and the external frames repainted. The open canopy will be fitted later, using either my own, heat moulded item, or one of the 'Squadron' vac-formed canopies, which will need separating from it's integral windscreen.
PIC 3. The Woodpecker cartoon nose art has been hand painted, as close as I could get to the original in this small size.
PICS 4 to 6. How the model looks to date. Note that the white 'spot' on the underside of the fuselage is the 'Micro Kristal Klear' lens cover for the amber I.D. lamp, which will be perfectly clear when dry.
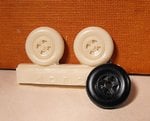
PIC 7. Next step is to clean, prepare and paint the 'True Details' resin wheels, which will be fitted once the kit's stub axles have been shortened, and holes drilled in the reverse of the resin hubs. These are the correct, later style four spoke hubs, and one of the kit wheels, a simplified moulding of the early pattern five spoke design, is shown alongside.
Once the wheels have been matched to the axles, the gear legs can be cemented in the down position, and the retraction struts, braces and doors fitted.
Thanks again for your continued interest and complimentary comments, and I'll post some more progress pics soon.
Attachments
you know Dogsbody, i like this more than the Spitfire !
bloody amazing stuff old boy, carry on !
bloody amazing stuff old boy, carry on !
- Thread starter
- #232
Airframes
Benevolens Magister
Thanks very much Wojtek and Karl.
Top effort Terry!
Vic Balshaw
Major General
What Karl said...............
woljags
Staff Sergeant
Terry its getting better and better
Lucky13
Forum Mascot
I always knew that you liked your birds dirty old boy, but this......
Smashing work old chap! It still impresses me that quality of work you put out, even with the pain.... My hat's off for you in respect old sausage!
Smashing work old chap! It still impresses me that quality of work you put out, even with the pain.... My hat's off for you in respect old sausage!
Crimea_River
Marshal
Amazing work Terry. This could well my favourite of the many excellent models you've turned out. The exhaust colours and hand painted woodpecker are superb!
- Thread starter
- #239
Airframes
Benevolens Magister
I say chaps, I've gone all embarrassed and red in the face - or was that through sitting in the rare and very welcome sunshine outside the pub this afternoon ?!!
It's very much appreciated to receive such complimentary replies, and I just hope I can make this another worthy memorial to Bob Cross.
Hopefully I'll have another up-date in the next day or so. Thanks again for your support and interest.
It's very much appreciated to receive such complimentary replies, and I just hope I can make this another worthy memorial to Bob Cross.
Hopefully I'll have another up-date in the next day or so. Thanks again for your support and interest.
Users who are viewing this thread
Total: 1 (members: 0, guests: 1)

