Boscombe Down Harvard 1/48th scale.

Ad: This forum contains affiliate links to products on Amazon and eBay. More information in Terms and rules
Thanks very much Dirk and Destrozas.
Didn't get much done tonight, apart from cleaning-up the sprue attachments on the wings, and joining the upper and lower wing sections. Did a bit on the engine, and a lot of 'how to' planning - might have pics tomorrow.
 
Pics as promised.
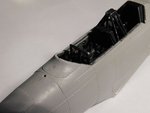
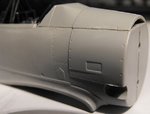
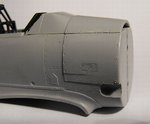
PICS 1 and 2. Another unwanted panel was discovered on the starboard nose section, which has been filled and had the first sanding. After priming, this will be checked for blemishes and treated as required.
PIC 3. The rear antenna mast is not present on the MkIIB, so the hole has been filled and awaits sanding.
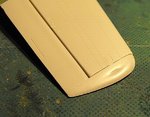
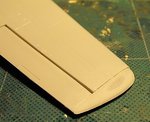
PICS 4 and 5. A sink mark on the lower port wing tip was also filled and sanded.
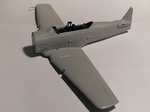
PIC 6. The forward fuselage top decking and the wings have been fitted.
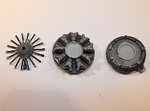
PIC 7. The main engine components have been assembled and the base colours applied. Once the crank case gear box/push rod assembly has been fitted, I'll probably add ignition wires, before carrying out the detail painting. Note that the exhaust pipe on the collector ring will be removed, as the MkIIB had the extended exhaust, along the starboard fuselage.
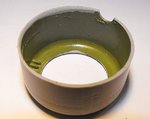
PIC 8. The upper rim of the engine cowling has been thinned down, to present a more scale appearance when fitted, as this stands proud of the fuselage.
Thanks again for your continued interest, and I'll post more pics when the engine is done.
 

Attachments

  • Harvard Build 037.jpg
    Harvard Build 037.jpg
    38.4 KB · Views: 95
  • Harvard Build 040.jpg
    Harvard Build 040.jpg
    42.6 KB · Views: 91
  • Harvard Build 041.jpg
    Harvard Build 041.jpg
    37.4 KB · Views: 83
  • Harvard Build 039.jpg
    Harvard Build 039.jpg
    61.9 KB · Views: 84
  • Harvard Build 042.jpg
    Harvard Build 042.jpg
    58.4 KB · Views: 93
  • Harvard Build 043.jpg
    Harvard Build 043.jpg
    42.9 KB · Views: 97
  • Harvard Build 047.jpg
    Harvard Build 047.jpg
    44.5 KB · Views: 76
  • Harvard Build 050.jpg
    Harvard Build 050.jpg
    45 KB · Views: 104
Thanks Andy, and you're not wrong! The filler dropped out of that bl**dy cavern, so I had to do it again!
Anyway, the engine is now fully assembled and the ignition wires fitted, and is currently setting before the detail painting is carried out (pics tomorrow).
Meanwhile, as I was wide awake, with little chance of sleep yet, I decided to get on with some more of the airframe.
PIC 1 shows the rudder as supplied in the kit, with the twin I.D. lamps, and an inspection cover on the starboard side, none of which are present on the Boscombe MkIIB.
PIC 2. The rudder after removal of these unwanted items.
PICS 3 and 4 show the upper surfaces of the starboard and port tailplanes, with the trim tab actuator on the port side, and an inspection cover on the starboard. The trim actuator should be on the starboard underside.
PIC 5. Simple remedy - swap the parts to the opposite sides! I couldn't verify whether or not there is an inspection cover on the port underside elevator, but as it can't really be seen, I decided to leave it, just in case!
Note that the trailing edges of the elevators have been slightly thinned, and the trim tabs enhanced.
PIC 6. Holes have been drilled, reamed and filed for the three signal lamps, correctly spaced unevenly, and these will be glazed with 'Micro Krsital Klear' after the model is painted.
PIC 7. How the model looks so far. The engine will be fitted after painting, along with the cowling, to avoid possible damage to the delicate ignition wires when masking.
I should have the engine painted and photographed tomorrow.
 

Attachments

  • Harvard Build 051.jpg
    Harvard Build 051.jpg
    88.6 KB · Views: 111
  • Harvard Build 056.jpg
    Harvard Build 056.jpg
    68.9 KB · Views: 99
  • Harvard Build 053.jpg
    Harvard Build 053.jpg
    53 KB · Views: 101
  • Harvard Build 054.jpg
    Harvard Build 054.jpg
    61.8 KB · Views: 103
  • Harvard Build 058.jpg
    Harvard Build 058.jpg
    48.3 KB · Views: 107
  • Harvard Build 059.jpg
    Harvard Build 059.jpg
    38.8 KB · Views: 105
  • Harvard Build 062.jpg
    Harvard Build 062.jpg
    32.9 KB · Views: 111
The tailplanrs on the real Harvard and I'm assuming the T6 are interchangable on the real aircraft right or left they should be the same
 
That's what I thought too Neil. Going off the instructions, the parts are as shown in the pics. But photographs of FT183 (the Boscombe MkIIB) show the trim tab actuator on the starboard underside - no actuator visible on the port under or upper surface, so presumably linked? The photos also indicate that there is no inspection panel on either upper surface.
 
Thanks Andy. Just a few more bits to add, then maybe the first paint stage. Gary is trying to get me some pics of the rear fuselage antenna set-up, but cameras aren't allowed on the base, so might not get them, although it looks fairly straight forward in the pics I already have. Once that's sorted, the painting can begin.
 
Got the small bits in place, as far as it can go before painting. Sorry, camera batteries died and this numpty forgot to charge the spares! Pics tomorrow, as I have an important appointment to keep tonight. Er...well ...er....OK, so I'm going to the pub - fireworks and food, can't be bad !!
 
Here's where it's up to so far.
PIC 1 The engine is assembled and painted, and the ignition wires added from lead wire. The crank case has yet to have a clear gloss coat.
PIC 2. A slot has been cut for the dorsal blade antenna, which will be made from plastic card and added later. The tail plane joints have been filled with PVA, which has dried clear of course.
PIC 3. Intake scoops added, although not yet cleaned-up or sealed, and the wing centre section joint filled with PVA.
PIC 4. Aileron underside hinges in place, in the correct position, not as shown on the instruction sheet !
PIC 5. Tail wheel fitted, after removing moulding seams. This will be painted after the model has been painted.
PIC 6. Landing lamp lenses have been made from slices of plastic tube. These will be reamed out, and painted with a chrome silver 'paint pen', the housings then painted Interior Green, and the clear covers added and masked.
Next step is a general clean, then masking and spraying a light-coloured primer coat, followed by the yellow.
Thanks again for your continued interest, and I hope to post more pics probably tomorrow.
 

Attachments

  • Harvard Build 065.jpg
    Harvard Build 065.jpg
    58.7 KB · Views: 92
  • Harvard Build 068.jpg
    Harvard Build 068.jpg
    38.5 KB · Views: 95
  • Harvard Build 069.jpg
    Harvard Build 069.jpg
    36.1 KB · Views: 99
  • Harvard Build 070.jpg
    Harvard Build 070.jpg
    30 KB · Views: 98
  • Harvard Build 072.jpg
    Harvard Build 072.jpg
    37 KB · Views: 93
  • Harvard Build 073.jpg
    Harvard Build 073.jpg
    32.1 KB · Views: 102

Users who are viewing this thread

Back