**** DONE: 1/48 RF-8A Crusader VFP-62 Operation "Blue Moon" 1962

Ad: This forum contains affiliate links to products on Amazon and eBay. More information in Terms and rules

happy0034.gif

Thanks mate, bl**dy fantastic, have page marked it and with my old laptop now in the hobby room.....................:p :p :p

:hotsun: :hotsun:
 
The last couple of weeks have been slow, the need to get the Tornado's out of the way took priority but some time has been spent on doing more filing, scraping and fitting of the Aries parts to the resin fuselage. Today has also been a hive of activity, with the shed cleanup out of the way it was all modelling today.

3-3 Upper wing part.jpg
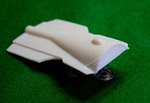
The first job was to get the resin upper wing spine to fit into the over wing slot and the cut out the centre of the kit main upper wing so it would accommodate the replacement.

3-1 Upper  Lower wing.jpg
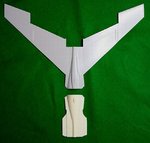
The kit's upper and lower wing parts.

3-2 Over wing spine.jpg
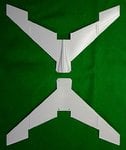
The new resin upper wing spine that has been recessed on the leading edge by me.

3-4 New spine.jpg
The upper wing unit showing the kit spine and the replacement resin spine.

3-5 New spine.jpg
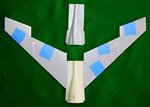
The kit upper wing spine has been removed and the replacement dry fitted over the kit lower wing.

3-7 Checking fitting.jpg
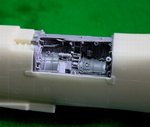
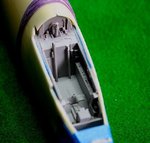
This next 5 pics show the two halves of the resin fuselage banded together and the Aeries parts dry fitted and checked.
3-8 Checking fitting.jpg
3-9 Checking fitting.jpg
3-10 Checking fitting.jpg
3-11 Checking fitting.jpg


3-12 Checking fitting.jpg
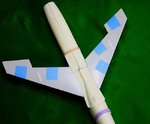
While banded together the wing unit was also tested.

3-13 Tail fin removed.jpg
The kit tail fin has to be removed and attached to the resin fuselage. The tail also had to be modified by removing the ECM fairing from the trailing edge.

:hotsun: :hotsun:
 
Last edited:
Thanks guys, appreciated. :oops:

Great job Vic :thumbright: A lot of major surgery going on there. What % of the of the original kit will be left when you're done?

As Terry says, a box, plus one tailless fuselage and all the innards which when stuck together could become a good test bed for experimenting. I also have another Crusader (Revell) which could benefit from the leftovers and more fun building. :p :p

:hotsun: :hotsun:
 
Thanks for the comments guys. Most encouraging.

Today was earmarked for a bit of spraying but sods law kicked in and it's to damp. I do my spraying out in the shed and with the damp air, there's no telling how this would affect paintwork.

With this being a photo reconnaissance aircraft, it's sort of scattered with camera windows at the forward end. In many of the pictures I've looked at they seem to all be black but on looking close one can see that this is not so they are mostly clear. This put me into a bit of a dilemma as on paintings and profiles they are shown as black so should I also represent them on the model as black or should I try to replicate the windows. I've thought long and hard on this and today have thrown caution to the wind and started cutting out the windows and making plastic in-fills. This series of shots are the result of this afternoons work.

4-1 Photo.jpg

1. The first window cut almost to size and the holes drilled through the resin fuselage. This in itself was a bit of a problem as the inside is somewhat thick and even thicker on the bendy edges.

4-2 Photo window.jpg

2. First window test fitted.

4-3 Photo window.jpg

3 4. Close-ups of the fitting.
4-4 Photo window.jpg


4-5 Photo window.jpg

5. Four down, four to go.
 
Last edited:

Users who are viewing this thread

Back