**** DONE: 1/48 RF-8A Crusader VFP-62 Operation "Blue Moon" 1962

Ad: This forum contains affiliate links to products on Amazon and eBay. More information in Terms and rules

Many thanks Terry, but I recon with the Squadron Signal Walk Around received from Cory today, I'll be right for the moment. :p

Thanks again Cory, great stuff. :lol: :lol:

:hotsun: :hotsun:
 
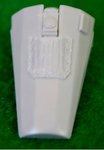
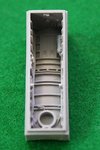
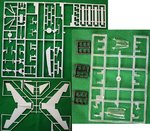
When I looked at the bits and pieces for this build yesterday, I was somewhat daunted at what I had committed myself. The RVHP resin fuselage, though correctly moulded, the moulding requires a lot of work. With also using the Aires resin parts that are designed for the Hasegawa kit, I've found that even more fiddling is required to get them to fit the RVHP resin parts. :mad: So for the last couple of days it's been a scraping, filing, grinding and cussing time. :rolleyes: I've managed to get the engine bay that sits under the main wing and air break and the main wheel bays to fit, almost. :evil: Have spent today working on the cockpit. The pictures below represent all the main fiddly bits that need fitting.

Pic 1. The tail pipe exhaust Aires resin parts. I have to say that they are the cleanest resin enhancement parts I've ever seen.

Pic. 2 to 4. The Aires main cockpit tube with the starboard and port side walls.

Pic 5. This Aires ejector seat minus the photo etched fittings which also come with the Aires kit.

Pic 6. The Aires nose wheel bay which on the Hasegawa kit is attached to the lower half of the air intake.

Pic 7 8. This is the Aires starboard and port views of the main wheel bays.

Pic 9. The Aires engine compartment that sits under the main wing spars, the whole wing being able to move upward from the leasing edge.

Pic 10. The Aires forward cockpit sill.

Pic 11 12. These are the two halves of the RVHP resin fuselage in their raw form with the Hasegawa parts next. The tail fin of the Hasegawa kit needs to be removed and attached to the RVHP parts.

Pic 13 14. The remaining Hasegawa parts.

:hotsun: :hotsun:
 

Attachments

  • 2-1 Jet Pipe (Resin).jpg
    2-1 Jet Pipe (Resin).jpg
    49.5 KB · Views: 108
  • 2-2 Office (Resin).jpg
    2-2 Office (Resin).jpg
    21.4 KB · Views: 127
  • 2-3 Office Stbd wall (Resin).jpg
    2-3 Office Stbd wall (Resin).jpg
    14.6 KB · Views: 106
  • 2-4 Office Port wall (Resin).jpg
    2-4 Office Port wall (Resin).jpg
    17.4 KB · Views: 130
  • 2-5 Seat (Resin).jpg
    2-5 Seat (Resin).jpg
    12.1 KB · Views: 103
  • 2-10 Forward cockpit ledge (Resin).jpg
    2-10 Forward cockpit ledge (Resin).jpg
    9.7 KB · Views: 232
  • 2-9 Upper engine bay (Resin).jpg
    2-9 Upper engine bay (Resin).jpg
    51.5 KB · Views: 107
  • 2-8 Main wheel bay port (Resin).jpg
    2-8 Main wheel bay port (Resin).jpg
    36.9 KB · Views: 102
  • 2-7 Main wheel bay stbd (Resin).jpg
    2-7 Main wheel bay stbd (Resin).jpg
    26.9 KB · Views: 100
  • 2-6 Nose wheel bay (Resin).jpg
    2-6 Nose wheel bay (Resin).jpg
    27.8 KB · Views: 114
  • 2-11 RVHPs resin fusalage.jpg
    2-11 RVHPs resin fusalage.jpg
    21.8 KB · Views: 119
  • 2-12 Hasegawa fusalage.jpg
    2-12 Hasegawa fusalage.jpg
    33.1 KB · Views: 116
  • 2-13 Hasegawa kit parts.jpg
    2-13 Hasegawa kit parts.jpg
    212.4 KB · Views: 104
  • 2-14 Hasegawa kit parts.jpg
    2-14 Hasegawa kit parts.jpg
    162.5 KB · Views: 130
Thanks for the confidence guy's, it's going to be a big challenge, but what the heck, what else am I gon'na do!!!................:confused: :confused:

:hotsun: :hotsun:
 

Users who are viewing this thread

Back