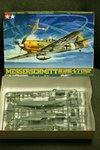
**** DONE: 1/48 Tamiya Bf 109E4 Black 8 of 2/JG3 Ofw Bernhard Lampskemper Group Build

Ad: This forum contains affiliate links to products on Amazon and eBay. More information in Terms and rules

Crimea_River

Marshal
46,074
14,123
Nov 16, 2008
Calgary
Username: Crimea River
Name: Andy
Category 1 Advanced
Model: Bf109E-4
Scale: 1:48
Manufacturer: Tamiya
Aftermarket addons: Eduard seat belts, Aeromaster decals, minor scratch built details

I believe this will be the 10th 109 in the GB - sorry about that but I had bought this kit in May with the intention of entering it. I hope to balance the inequity by entering a 2nd model from the British side.I plan this to be a relatively straightforward, virtually OOB build (famous last words)

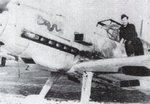
The scheme will be for 'Black 8', W.Nr. 5338 flown by Bernhard Lampskemper of 2/JG3. On 29 August 1940, Lampskemper took off with his staffel on a mid-afternoon "freie-jagd" and, upon crossing the English coast at a height of 22,000 feet, was bounced by Spitfires and hit in the engine. He managed to glide down to a smooth crash-landing near Pevensey and was captured unhurt despite being shot at from the ground by anti-aircraft guns when he was a few hundred feet off the ground.

If anyone has any more info on the pilot or plane, please post.
 

Attachments

  • 100812 Scheme.jpg
    100812 Scheme.jpg
    111.2 KB · Views: 290
  • 0-Bf-109E-II_JG3-(B8+)-Lampskemper-WNr-5338-France-1940-0A.jpg
    0-Bf-109E-II_JG3-(B8+)-Lampskemper-WNr-5338-France-1940-0A.jpg
    50.8 KB · Views: 294
  • 1-Bf-109E-II.JG3-(B8+)-Lampskemper-WNr-5338-France-1940-01.jpg
    1-Bf-109E-II.JG3-(B8+)-Lampskemper-WNr-5338-France-1940-01.jpg
    203.8 KB · Views: 235
Last edited:
Thanks guys. There's been some question as to whether the yellow wing tips appeared on top as well as the bottom. If anyone knows, holler.
 
Nice one Andy. This kite was going to be one of my choices for one of the 1/32nd scale kits, but I decided to stay awat from the yellow this time !
As far as I know, when yellow, or white, I.D. colours were added to wing tips (and tail plane tips, when applied), it was on both surfaces. Don't know of any in the BoB on just one surface, although there might have been. Seems pointless having a quick recognition feature on one side only !
 
Almost missed this one Andy, so we have ten 109s, almost a Luftwaffe Geschwader, if that's the right word.
 
Been having a look for more info for you Andy. I've found a couple of pics, but I need to double check a few things, as they're described as being red numbers, not black, and in more than one publication. The profile looks like it's from the Jagdwaffe books, and I've checked some pics in there which appear to have been taken at the the same time as the ones I refer to, so it's all getting a bit cloudy. Who to believe ??!!
 
Thanks guys. Between my trip to Duxford and finishing my CF-5, little has been done to this kit but I will get at it over the next few days.

My struggle will be to keep this simple and OOB. No PE or aftermarket stuff for a change, and no over the top scratch building.

Terry, thanks for continuing to look for this stuff. I don't know where the profile is from but I found it on the net. A couple of decal manufuacturers make this out as Black 8 but if you can convince me it's red I can switch.
 
I'm still not sure myself Andy, but I'm still checking a few things. I'd work on the assumption it's Black, unless I find really strong evidence to the contrary.
 
Well, after a lot of double-checking, I'd have to agree it is 'Black 8'.
The Jagdwaffe books show it as so, according to the caption and info regarding other aircraft of the Staffel, as do some other publications. The doubt arose over a caption in a magazine and a booklet from the early 1980s, on a pic a B&W profile, stating red numbers. I've since found one of the same pics, in an article by the same author, stating black numbers, and examination of the tones in the pic bears this out.
So, it's safe to go with black !!!
 
Thanks Terry. My Aeromaster decals actually reference the Jagdwaffe books as where they got the schemes from. Did you actually see a pic of this aircraft there? The one at the front of this post was found on the internet and is purported to be one this actual plane. However, I have my doubts as, if you look in the top right of the photo, you can just make out what appears to be the edge of the a/c number and is does not look like it would be an 8. Rather it looks like a 1.

OK, now that I have a few days off, I've been putting some time into getting this one started. Here's where we stand so far. The instrument panel was hand painted on the sprue based on a few colour references. The panel is very small and I'm not that impressed with the outcome. Looks satisfactory from a distance though. Maybe I'm spoiled having typically used the PE stuff.

100908 Inst Panel.jpg


Below is the cockpit glued into the right half of the fuselage. Everything was first painted in RLM 02, except the breaker box which was black with white caps on the buttons and the oxygen container which was given a dull aluminum colour. Then everything was given a wash of thinned brown/grey. The seat received a cushion made of Milliput with a Tamiya tape strap stretched behind the seat to hold it up. PE seatbelts protrude through the cushion and the map case received a couple of pieces of paper as maps.

100909 Fuselage Open with Pit.jpg


Next is the fuselage glued together and before sanding the seams. The areas on the engine block that will be visible through holes in the cowl were painted black. The left side of the cockpit was used as is, having resisted the temptation to scratch build a new throttle and mixture control.

100909 Fuselage Together.jpg


Next we have the MGs drilled out before painting and placing on top of the engine.

100909 MGs Drilled Out.jpg


The picture below shows the MGs now painted and glued in place as well as the cockpit viewed from behind with the rudder pedals and oxygen equipment visible. Also, the fuselage seams have been sanded and polished up. I will be adding scratch built fuel pump and fuel selector levers on the right and left sides of the instrument panel, respectively at a later date.

100909 Pit with seams sanded.jpg


Finally, here's a shot of one of the gear legs painted RLM 02 and the oleo section done with Testors silver.

100909 Oleo.jpg


The wing halves have been glued together and will be assembled to the fuselage tonight to set over night. The fit on this model is superb and it's been going together like a dream. There will be little, if any need to open my tube of putty, a welcome departure from my kitbashed CF-5 which is still staring at me.

Thanks for your interest and nice to be finally participating in this build.
 
Last edited:

Users who are viewing this thread

Back