B-17engineer
Colonel
Great job T!!
Follow along with the video below to see how to install our site as a web app on your home screen.
Note: This feature may not be available in some browsers.
Ad: This forum contains affiliate links to products on Amazon and eBay. More information in Terms and rules
Stellar work Terry.
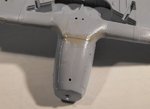
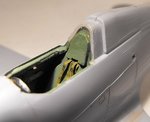
The Hobbycraft kit is OK but the decals are a disaster. You'll end up painting everything or will need to raid your spare sheets. PE parts are included, somewhat unnecesarily as the expected stuff like seatbelts are not included but the cockpit frame, which I'd rather have as round tubing is included on the PE so they're flat. The prop blades are thick and have some pretty bad sink marks in them. Canopy is molded in 1 piece and on the thick side. I got a vac form one.
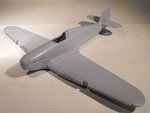
Overall, it should come out OK with a bit of grunt work.