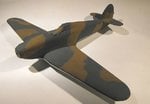
**** DONE: Hurricane Mk1, L1807, DU-X, 312 (Czech)Sqn, RAF, October 1940 Group Build.

Ad: This forum contains affiliate links to products on Amazon and eBay. More information in Terms and rules

it´s gonna be a long nite Terry...I´m just watching on internet an icehockey match of my team as my wife is still at school so I couldn´t go to the stadium so I´m suffering, especially because we are winning 6:0 after 2nd period...every time I stay at home we score a lot and every time I go there we loose...
Then I go for a beer to the pub in front of my apartment- you were there with Karl (in fact it was the first Czech pub you were in with a smoke all around).
 
Sounds good to me! I was going to go to the pub tonight, but it's blowing a real hooley outside, and cold, with more rain to follow. So, I'll stay in and do some more on the Hurricane and Bf109.
Have a pint or two for me while you're there Roman !!
PS - I guess your team pray that you don't turn up to see their games !!
 
Well, it's now ready for some paint !
All the little fiddly jobs have been done, such as filing, sanding and polishing, and smoothing out areas such as wing joints, and some extra detail has been added to intakes, and control surface hinge lines.
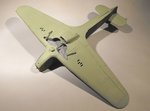
The model has now been cleaned and polished, although this hadn't been done when the pics were taken, and is now masked, ready for spraying the 'Sky' under surfaces.
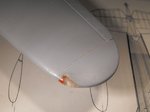
PIC 1. The navigation lamps have been filed to shape, sanded smooth and polished, and will recieve a gloss clear coat after the model has been painted.
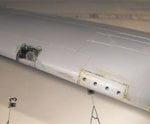
PIC 2. The landing lamps have been glazed, and the transparent covers fitted, and await final polishing in this pic. The moulded gun ports have also been drilled out, to give a more realistic appearance once the 'fabric' patches have been added and 'torn'.
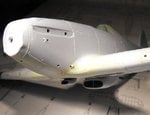
PIC 3. All the small vents and intake scoops on the nose have been drilled out. I would have preferred to use a thinner drill bit, which I do have, but the pin vice wouldn't grip it !
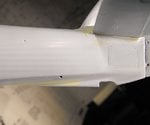
PIC 4. The rear fuselage lifting points have been drilled, at lower right. Above and left can be seen the small hole drilled for the IFF wire attachment point. Small holes have also been drilled into each tail plane tip for these wires, which will be added near the very end of the build.
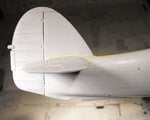
PIC 5. The tail lamp housing has been slightly re-shaped, and drilled out, and will be painted and glazed after the model has been painted. Just visible near the rudder trim tab, are the holes drilled for the actuator cable and horn, which will be made from stretched sprue, and fitted later.
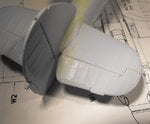
PIC 6. Some hinge detail has been engraved into the elevators, and the trim tabs engraved. Also visible is the hole drilled into the top of the rudder, for the fin antenna post.
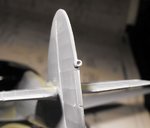
PIC 7. The rudder has received similar treatment. The small hole at the right of the photo is the IFF wire attachment point.
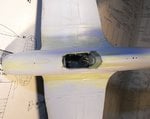
PIC 8. The top of the fuselage has had holes drilled for the bead post sight, on the cowling, and for the top navigation lamp and antenna wire lead-in, the latter two front and rear respectively of the hole for the antenna mast.
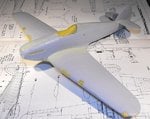
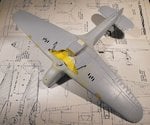
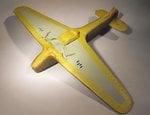
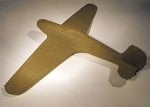
PICS 9 and 10. The model masked, ready for painting.
I hope to get the basic painting completed this weekend, in between working on the Bf109, and house cleaning !
Although this started as an OOB build, I decided to do a bit more, just to give some idea of what can be done with an oldish, basic kit, without going overboard, or using after market accessories.
Thanks again for your kind comments and interest, all of which is very much appreciated.
 

Attachments

  • BoB Hurri build 070.jpg
    BoB Hurri build 070.jpg
    21 KB · Views: 95
  • BoB Hurri build 074.jpg
    BoB Hurri build 074.jpg
    23.9 KB · Views: 112
  • BoB Hurri build 079.jpg
    BoB Hurri build 079.jpg
    25.9 KB · Views: 100
  • BoB Hurri build 080.jpg
    BoB Hurri build 080.jpg
    20.9 KB · Views: 110
  • BoB Hurri build 081.jpg
    BoB Hurri build 081.jpg
    23.6 KB · Views: 99
  • BoB Hurri build 090.jpg
    BoB Hurri build 090.jpg
    51.3 KB · Views: 95
  • BoB Hurri build 087.jpg
    BoB Hurri build 087.jpg
    59.7 KB · Views: 114
  • BoB Hurri build 086.jpg
    BoB Hurri build 086.jpg
    32.6 KB · Views: 108
  • BoB Hurri build 084.jpg
    BoB Hurri build 084.jpg
    22.6 KB · Views: 101
  • BoB Hurri build 083.jpg
    BoB Hurri build 083.jpg
    31.1 KB · Views: 97
Thanks very much Wojtek, Glenn and Karl. It's actually not a bad kit overall, and accurate down to the off set fin. The basics are all there, I've just 'brought them out' as it were.
I've got the undersides painted, and the Dark Earth applied, although I thought I'd come unstuck, as the Dark Earth was drying in the tin (again!), and both local sources are out of stock! There was just enough to cover the upper surfaces, so it's the Dark Green next.
I'll try to post some pics later, as I can't move the model at the moment, as the paint is still drying.
 
The model is now painted, and nearly ready for the detail painting, basic weathering, and then the gloss clear coat.
I wanted to use Humbrol 163 Satin Dark Green, as this has a better hue than the Humbrol 30, which has gone a bit 'bright' lately (more Humbrol problems!), but when I opened the almost new tin, that had gone off too !
So, revert back to the Humbrol 30 Dark Green, and fortunately I had a new, un-opened tin.
The colours look a little streaky and patchy in the pics, but some of this is intentional, as the basis for the worn, weathered look, and the rest is just the way the paint has dried. I normally find that a rub over with a damp cloth, once the paint has set for at least 12 hours, cures the uneven look.
PIC 1. Once the underside had dried, the model was masked, and the Dark Earth sprayed overall on the upper surfaces.
PIC 2. With the top surfaces dry, the camouflage demarcation was marked out in pencil, and then the Dark Green was sprayed freehand.
PICS 3 to 5. With the basic colours now sprayed, the masking was removed and the model checked to see if any areas needed re-touching. Fortunately, there was only one small area, around the leading edge of the wing roots, and this was quickly covered with a small brush. Some other areas, around the gun ports, landing lamps and nav lamps, may need a little attention once the masks are removed, after the clear coats.
That's it for now, and I hope to post some more very soon.
 

Attachments

  • BoB Hurri build 096.jpg
    BoB Hurri build 096.jpg
    27.5 KB · Views: 80
  • BoB Hurri build 095.jpg
    BoB Hurri build 095.jpg
    21.4 KB · Views: 82
  • BoB Hurri build 098.jpg
    BoB Hurri build 098.jpg
    22 KB · Views: 90
  • BoB Hurri build 099.jpg
    BoB Hurri build 099.jpg
    20.4 KB · Views: 83
  • BoB Hurri build 097.jpg
    BoB Hurri build 097.jpg
    24 KB · Views: 90
Turned out great Terry. I think the slight streakyness makes it look more realistic. I like that pencil method you use for freehand spraying. I borrowed it for the fuselage side camo on my 109E-1
 
Thanks Glenn. I find it much easier to use pencil lines, rather than using masks, especially that plan drawing nonsense. Also saves time, and materials, applying and removing masks.
 

Users who are viewing this thread

Back