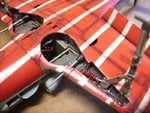
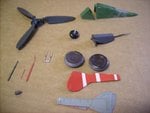
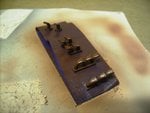
Done : JV44 Fw190D-9 "Red1" of Heinz Sachsenberg Gruppe Build....

Ad: This forum contains affiliate links to products on Amazon and eBay. More information in Terms and rules

Bring it on, LMFAO....

Dude, u got serious skills compared to me... This is the first time I attempted a camo job like this, EVER, let alone with an airbrush....

And only my 3rd model in the last 25+ years....

The only thing I can bring on is a decent attempt by a novice to show what one can do with a 1/32nd scale... I have learned alot with this build tho, several very valuable lessons...
 
Thanks alot guys.... Still alot of work left to be done....

I do have a question concerning decals... I want to slice my decals to match the panel lines, drop them in and weather the panel line over it, creating a very realistic look...

How do I do it??? When do I do it??
 
When.....for sure when applying them on the model surfaces.
How......You can use MicroSet and MicroSol or similar liquids of other firms for the purpose.Other ways are too dangerous for decals I think.
 
I agree with Wojtek, a decal setting solution would be much safer than cutting the decals. Other brands include Humbrol, Testors and Gunze Sangyo Mr. mark softer.

Beautiful mottling, by the way!!!!
 
Great job Dan, love the paintwork. Do NOT slice your decals - do as the guys suggested, use Micro Sol/Set or similar, and let it do its work. Once totally set, then you can do any weathering/panel lines etc, preferably after a sealing coat. I normally give a quick burst of gloss again, just over the decal area, only thin, just to seal them down, then do the work. You can embelish it, if required, after the semi-matt coat, and if you think it needs it, re-coat over that.
 
OK guys, got it.... I have Micro Set so I will use that....

I thought I remembered Wayne talkin about cutting them down thru the panel lines.... Maybe I was wrong....

In using it, do I still let the decal soak in warm water, then place it on a puddle of Micro Set that is on the model??? What is the recommended method??

As an update, Ive got the last of the gloss coating done, the rims/hubs painted, the headrest and armor plate are glued and glossed, the landing gear struts are done, and the aerials painted...

All thats left besides spraying the black rubber on the tires is the spinner......
 
You're like me Dan, you've only got one of the Micro solutions! I normally just get the 'Sol', to soften AND set the decal, as I haven't found much difference in their make up! It should work the same, or very similar, just using the Micro Set - soak the decal as normal, then place it on some tissue to absorb most of the excess water. Put a drop or two of the Micro on the decal, leave it for a minute maybe, then place the decal on the area, that has had more Micro applied; just wet the area, don't flood it. When you're happy the decal is exactly where you want it, press it in place as normal. Put a touch of the solution over it, and LEAVE IT! It might alarm you if you see it crinkling but, as long as it isn't lifting off or curling, that's normal! It will eventually pulldown and settle onto/into the contours.
If you can, get a bottle of the other solution also, so that you have both, and follow the instructions, which should be similar to above. Once the decal is totally dry and set (I normally lave them at least overnight), then you can carefully cut if neccessary, to follow engraved lines, joints etc, preferably by just lightly going over the required line. It's best to seal the decal first though, and in most cases, you should find that you won't need to cut through them, as they should settle into/over all the detail features. Before you give them any coats of sealer, or finishing clear coat, you may need to remove any residue of the Micro solution, or the decal adhesive. This is easily done with a soft brush (or lint-free cloth) and water, then, when dry, just clean the area carefully with a dry wipe over.
 
Les, I'm really impressed. Your build is coming along beautifully! I love the shading of your panel lines and the crisp lines on the lower half. Well done.
 
I use them both, the Set and the Sol. I was sceptic at first to the "they'll look like they're painted on", until I used it on the instrument panel....bl**dy h*ll :shock: they DO bl**dy look painted on! :lol: You could say that I was impressed and well chuffed! :lol:
 
I thought I remembered Wayne talkin about cutting them down thru the panel lines.... Maybe I was wrong....

No....you're not....I do cut some....usually well after they have set! sometimes the softener doesnt pull them down fully so depending on the decal I will cut or prick them and hit them with the softener again...to get them to settle fully.
Sometimes I roll my fingernail along the panel lines too, to settle or stretch or push them down....other times I re-use the pencil VERY carefully as you can tear the decal.....most of this extra stuff is well after the decal has settled and dried in place....
 
Little bit a work done this morning, in the cold ass garage... Gear is attached, so are the cannon... Some custom work done with the gear, still workin on the wheels...

Got the manifolds painted and light glossed, ready for some detail, installation and weathering, then the matte coat...

May start some decals, we'll see...
 

Attachments

  • gear stbd013.jpg
    gear stbd013.jpg
    115.6 KB · Views: 80
  • gear 014.jpg
    gear 014.jpg
    76.9 KB · Views: 75
  • gear 018.jpg
    gear 018.jpg
    80.6 KB · Views: 76

Users who are viewing this thread

Back