Navigation
Install the app
How to install the app on iOS
Follow along with the video below to see how to install our site as a web app on your home screen.
Note: This feature may not be available in some browsers.
More options
You are using an out of date browser. It may not display this or other websites correctly.
You should upgrade or use an alternative browser.
You should upgrade or use an alternative browser.
1/32 Spitfire Mk.Vb - Defence of Britain/Atlantic.
Ad: This forum contains affiliate links to products on Amazon and eBay. More information in Terms and rules
More options
Who Replied?JKim
Senior Master Sergeant
Great details Terry! This one should look awesome once all the bits and pieces are attached.
- Thread starter
- #303
Airframes
Benevolens Magister
Thanks very much chaps, it's very much appreciated.
And can tyres catch fyre ? Surely you know they kan .......
And can tyres catch fyre ? Surely you know they kan .......
Great work so far Terry!
- Thread starter
- #305
Airframes
Benevolens Magister
Thanks Hugh !
Into the final stages now, with all the'fiddly bits' to do.
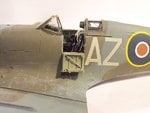
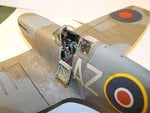
The gun sight has been painted and fitted, and after cleaning and polishing, the windscreen was fitted, along with the cockpit door.
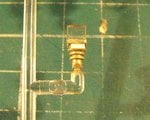
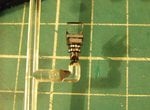
PIC 1. The reflector gun sight was first painted with a mix of silver and gold, to hopefully create the projection elements within the body, and a 'crash pad' was added from scrap plastic sheet.
PIC 2. Once the silver/gold had thoroughly dried, the body of the sight was painted black, along with the reflector glass supports, and the surround of the lens. The crash pads, one at the top, around the lens collar, and the added one, were painted dark grey 'rubber', and the knurled adjusting rings simulated with stripes of grey paint. A bit rough, but looks acceptable to the naked eye. When viewed from the top, the silver/gold tone looks quite convincing as the projector elements, so that worked out quite well.
PIC 3. Once dry, the sight was fitted to the cockpit bracket. I tried adding a power lead, but access was too difficult for my stiff hands, and I doubt it would be seen anyway.
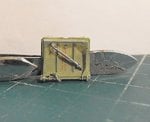
PIC 4. The resin cockpit door has had some 'wear' added around the springs, latches and latch rod, and also around the sill area, where the pilot's feet would abrade the paint. The latch handle was painted very dark brown - the yellow/black stripes often seen were a post war addition. The separate crow bar was painted in a 'worn steel' shade whilst still on the casting block, then carefully removed and clipped into place on the door.
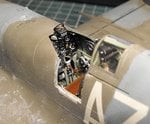
PICS 5 and 6. The windscreen was fitted using Humbrol 'Clear Fix', and the joints sealed using PVA adhesive - the shiny, lumpy look around the edges is excess adhesive which has since been cleaned off. Once fully set, some retouching and a coat of clear matt should blend it in nicely. The internal bolts for the armoured glass and the lower frame were simulated with tiny spots of black paint.
The door was attached using CA adhesive, ans has yet to be re-touched along the sill, and around the door rebate.
Next step is to paint and fit the exhausts, add the brake lines to the gear legs and fit these, along with the tail wheel, then move on to the fiddly details in the form of the canopy latch and windscreen mirror.
Hopefully, I'll have more to show some time tomorrow.
Attachments
Crimea_River
Marshal
Schmick.
le_steph40
Chief Master Sergeant
8) 
- Thread starter
- #309
Airframes
Benevolens Magister
Schanks guysh ! (That's my Sean Connery impersonation !)
T Bolt
Colonel
Looking real nice Terry
Sure is
- Thread starter
- #312
Airframes
Benevolens Magister
Thanks Glenn and Karl.
I'm hoping to get most of the final details done tonight, and might get it finished over the weekend.
I'm hoping to get most of the final details done tonight, and might get it finished over the weekend.
Lucky13
Forum Mascot
Woof woof.... 
Lovely work so far Terry!
- Thread starter
- #315
Airframes
Benevolens Magister
Thanks Jan and Hugh.
Got a few more bits and pieces done, including the exhausts, but not much to see yet. I'll pot some pics some time tomorrow, when there's more to show.
Got a few more bits and pieces done, including the exhausts, but not much to see yet. I'll pot some pics some time tomorrow, when there's more to show.
Vic Balshaw
Major General
Smashin Terry.
- Thread starter
- #317
Airframes
Benevolens Magister
Thanks Vic.
I'd hoped to get a lot more done, but so far, the weekend seems to have passed in a flash, with no modelling done yet - but I should get some done later today.
I'd hoped to get a lot more done, but so far, the weekend seems to have passed in a flash, with no modelling done yet - but I should get some done later today.
Very Nice Terry.
JKim
Senior Master Sergeant
That's a wonderful model Terry!
- Thread starter
- #320
Airframes
Benevolens Magister
Thanks chaps. no more progress I'm afraid - been in bed with a nasty cold the last two days. Hope to get back to it tomorrow though.
Users who are viewing this thread
Total: 1 (members: 0, guests: 1)

