Crimea_River
Marshal
You're really moving Corey! Two more for the GB after this!
Follow along with the video below to see how to install our site as a web app on your home screen.
Note: This feature may not be available in some browsers.
Ad: This forum contains affiliate links to products on Amazon and eBay. More information in Terms and rules

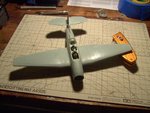
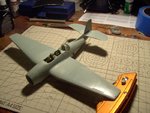
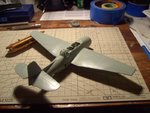
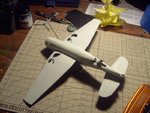
It's not that bad.. first the top layer chunks off into big pieces then you hit the core of the glue and thats when the "uniform" surface starts to show between the glue and plastic. It only takes some time because there's so many seams to be filled in on the aircraft. (I put glue over every seam, just as a safety valve). But its been the best path for me, as putty shrinks and sinks, CA does the job!