- Thread starter
- #381
lesofprimus
Brigadier General
Wayne said:fire away man! See if i can help!
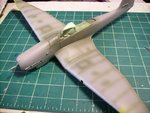
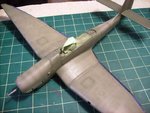
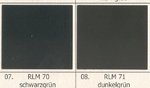
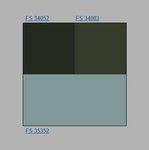
Some advice here Wayne, should I now change up the color alittle bit to add to the fading look??? Put a couple of drops of flat black into the RLM 71 and shoot it again???
Or will it just deepen after the second and third coat??? Problem I have is that the elevators were sprayed my regular old way, and I didnt think think about this before... I know Ill have to run over them again with a slightly shaded color to try and get the effect of what Im doin with the rest of the model...
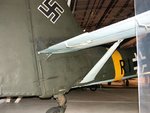
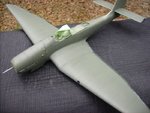
Then of course on this page is the ongoing debate about my canopy not sitting correctly when open, kida at a loss as to how to "fix" the problem...
And I still cant find a site online that actually sells a replacement canopy....
HELP!!!