- Thread starter
- #41
Navigation
Install the app
How to install the app on iOS
Follow along with the video below to see how to install our site as a web app on your home screen.
Note: This feature may not be available in some browsers.
More options
You are using an out of date browser. It may not display this or other websites correctly.
You should upgrade or use an alternative browser.
You should upgrade or use an alternative browser.
DONE: 1/72 Minicraft B-24J Liberator, "The Dragon and His Tail" Group Build
- Thread starter Maglar
- Start date
Ad: This forum contains affiliate links to products on Amazon and eBay. More information in Terms and rules
More options
Who Replied?yeah.....lash out Rob!
...been a couple of days since you last posted hey!?
...been a couple of days since you last posted hey!?
dirkpitt289
Master Sergeant
Maglar
Great job so far. Like your B-17 I look forward to your progress on this one.
Regards
Dirk
Great job so far. Like your B-17 I look forward to your progress on this one.
Regards
Dirk
Lucky13
Forum Mascot
Looks great mate!
lol yeah, it has been a while since I posted.
and I know it's only 30 bucks. but I focus on other things such as my flight simulator. enhancing it as much as I possibly can so I can practice flying with a yoke and rudder pedals and such. cos I really am wanting to get my private pilot's license. plus I wanna move outta my parent's house and be more independent, but I'm not a saver, I'm a spender. lol
anyway, nice job, Mag! and y'all know what I'd do once I get that bird! and I'm not gonna use the aluminum color, I'm gonna paint her a niiiice chrome color to get that polished metal look. cos I got a nice biiiig bottle of chrome silver I can use to paint her
- Thread starter
- #46
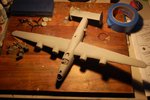
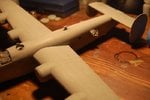
Here she is with the primer on. Been doing a bit of sanding as rattle cans sometimes leave rough gunky parts all over the spray job, so been smoothing all that crap off before the aluminum makes it too obvious. Also went ahead and sprayed the 4 nacelles to get them done so I can finish the engine and prop assembly.
Attachments
vikingBerserker
Lieutenant General
Nice!
Hey, Maglar, is it me or is there a discrepancy with the vertical tail feathers on your build? Maybe your pic is deceiving.
http://users.rlc.net/catfish/liberatorcrew/06_B-24/USAF%20Museum/Runway%20Fire2.jpg
http://users.rlc.net/catfish/liberatorcrew/06_B-24/USAF%20Museum/Runway%20Fire2.jpg
Heinz
Captain
Great stuff Maglar!
- Thread starter
- #50
DAMNIT minicraft instructions. You're right sweb....... any suggestions on loosening cement glue?
Yep. Use the liquid glue. It will wick into the joint and soften it enough for you to carefully separate the verticals. It will take a little time. Use a small pointed artist brush for applying the glue. They will begin to soften soon enough and you can wobble them while applying glue to break the bond. It evaporates quickly but it's a good exercise to learn. With care they should come apart with little or no damage. While the joints are still soft you can swap them to their proper sides and wick in a little more glue to ensure the joints are wetted throughout.
apart from your little setback...coming along nicely Mag!
Airframes
Benevolens Magister
I agree with Wayne. Of course, you could always leave the fins as they are, and tell the pilot to fly inverted.......
- Thread starter
- #54
Good on ya Mag....
- Thread starter
- #57
Hope it is not too bad....I'm confident that you will get it right Mag!
looks good Maglar
- Thread starter
- #60
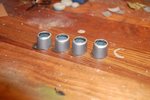
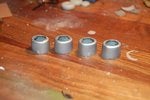
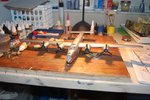
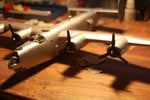
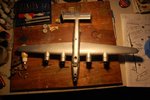
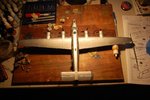
Somewhat of an update here. Been vacant having those 'modeling mood swings' but I was lucky to get the metal on. Not too much to do after this.. landing gear and wheels then decals!
Attachments
Users who are viewing this thread
Total: 1 (members: 0, guests: 1)

