Navigation
Install the app
How to install the app on iOS
Follow along with the video below to see how to install our site as a web app on your home screen.
Note: This feature may not be available in some browsers.
More options
You are using an out of date browser. It may not display this or other websites correctly.
You should upgrade or use an alternative browser.
You should upgrade or use an alternative browser.
Done : Fw190A-6 1./JG1 Unteroffizier Rudolf Hübl, White-5 Oct,1943 Gruppe Build
- Thread starter muller
- Start date
Ad: This forum contains affiliate links to products on Amazon and eBay. More information in Terms and rules
More options
Who Replied?Catch22
Major
Looking good Muller! I never can get those decals to work.
good work!
Thorlifter
Captain
Nice work Muller!! You guys amaze me with your models.
109ROAMING
2nd Lieutenant
looking good M
Njaco
The Pop-Tart Whisperer
Nice work Muller!! You guys amaze me with your models.
You ought to grab one and join in! Just as soon as Silly Season is over!
- Thread starter
- #167
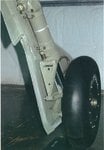
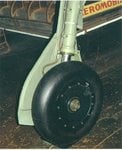
Thanks fellas!  I used Wayne's recipe for RLM02 on the undercarraige. I got the engine cowling painted and put it together last night, plus some of the checker decals on. Will post pics later.
I got outbid on my PE seatbelts on ebay earlier, but I found a better set on luckymodel.com for less money, plus free postage!
I got outbid on my PE seatbelts on ebay earlier, but I found a better set on luckymodel.com for less money, plus free postage!
- Thread starter
- #169
Airframes
Benevolens Magister
Looks great M, especially as decals over large curves are a pain! For the brake lines, use either stretched sprue, or, if you can get it fine enough, copper wire or fuse wire. Actually, in 1/48th, when painted, 'invisible thread' would look OK, and should glue easily and conform to where you want it.
Njaco
The Pop-Tart Whisperer
Nice job!! I wouldn't even attempt that myself.
Good work on the cowling
- Thread starter
- #174
- Thread starter
- #176
marek
Senior Airman
Good work, mate!
Airframes
Benevolens Magister
If you decide to use sprue, do the bend (cold) around a paint brush shank or dowel of suitable size, making a complete circle, then cut as required. But it's much easier to use copper wire!
Taking shape quickly M!
Users who are viewing this thread
Total: 1 (members: 0, guests: 1)


