*** DONE Italeri 1/48th scale Boston IIIA Group Build.

Ad: This forum contains affiliate links to products on Amazon and eBay. More information in Terms and rules

Great work Terry! Those tires do come in for a bit of stick, but I remember seeing a pic of a PBY with similar style tread, so I don't know. Usually a bit of sanding makes them less prominent, and if your going for the Kojac look all well and good.

Cheers

Peter
 
What's a TLA?!!!
Thanks guys. I don't know what the problem is with the criticism of the tyre treads. Yes, they look strange at first, but would look perfectly acceptable after painting and some tread weathering. The Boston manual actually shows this type of tread , so it's correct. It's a shame to have to sand it down to a smooth tread, so I might compromise, and have a softer tread, as I have seen evidence of some form of treaded tyre on RAF Bostons.
 
Thanks VB! And, we're in to the final furlong!
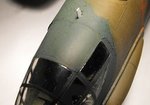
The wheels, or more correctly the tyres, have been filed and sanded, leaving a hint of a tread on the shoulders, and are now painted and fitted, along with the gear bay doors. The cockpit glazing has been sealed and touched-up, and the access hatch cover has had the lightening holes drilled out and is painted. The radio mast and the DF loop mounting have been sealed to the fuselage and painted, and the nose-mounted blade antenna added form plastic strip. A hatch door has been scratch-built for the nose compartment, and painted, and awaits fiiting, along with the cockpit hatch cover, the trailing aerial fairlead, and the rear access step, both of the latter currently under construction. All that remains is to fit the above parts, plus the landing lights, a scratch-built rear fuselage beacon, and the antenna wires; then it's on to the figures and the base etc.
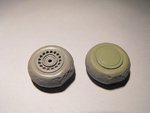
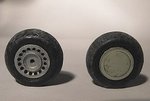
PICS 1 and 2 show the tyres being filed to remove the heavy tread, and the finished article, with the tread area showing 'concrete dust', and the rims dirtied a little. Note the paint is still drying in this shot.
PICS 3 and 4. The inner face of the cockpit hatch cover has the lightening holes moulded as depressions. This inner plate should be hollow, with the external metal cover visible through the hoes. So, all 35 holes, in three different sizes, were drilled out and reamed. The transparent part was given a thin wash of paint to make it easier to see the 'holes' properly and, when the drilling was completed, and the ejector pin marks removed, the part was glued to the 'solid' cover and painted. Again, the paint is still wet in the second pic.
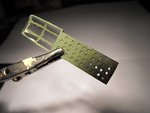
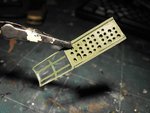
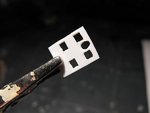
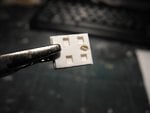
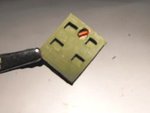
PICS 5 to 7. The inner panel of the nose entrance hatch, from plastic card, was made by cutting the square holes, and drilling and cutting the rounded, triangular depression for the locking handle, before carefully filing the inner edges of the cut-outs, using a jewellers file, the first pic showing the part before filing. This was then glued to the outer 'skin' of the hatch cover, and the locking handle added from stretched sprue, before painting the inner side Interior Green, with a red handle, and the outside 'Sky'. Sorry, the last view is slightly out of focus!
PIC 8. Is the small blade antenna on the nose, awaiting painting.
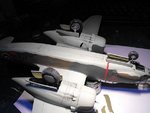
PIC 9. The landing gear and wheels in place, the latter not yet glued, and the gear well doors attached. These were a real pain to fit, as the locating lugs are fairly small, and the angles awkward. The two small holes just to the rear of the bomb bay were drilled to accept the 'legs' for the retractable boarding step. Some more work has yet to be done on the exhaust staining, the initial streaks being more of a base and a guide, as some needs to be added to the gear doors.
I should get some more done on the model, and the base, later this week. First, I want to get the base and the accessories finished for the Beaufighter, for the MTO GB, and get it out of the way, as I need the desk space it's hogging!!
Thanks again for the compliments and interest.
 

Attachments

  • Bombers Build 167.jpg
    Bombers Build 167.jpg
    33.4 KB · Views: 126
  • Bombers Build 170.jpg
    Bombers Build 170.jpg
    26.2 KB · Views: 129
  • Bombers Build 171.jpg
    Bombers Build 171.jpg
    37.9 KB · Views: 113
  • Bombers Build 178.jpg
    Bombers Build 178.jpg
    51.3 KB · Views: 95
  • Bombers Build 172.jpg
    Bombers Build 172.jpg
    32.3 KB · Views: 129
  • Bombers Build 176.jpg
    Bombers Build 176.jpg
    29.1 KB · Views: 106
  • Bombers Build 179.jpg
    Bombers Build 179.jpg
    8.9 KB · Views: 120
  • Bombers Build 180.jpg
    Bombers Build 180.jpg
    16.2 KB · Views: 110
  • Bombers Build 183.jpg
    Bombers Build 183.jpg
    48.2 KB · Views: 126

Users who are viewing this thread

Back