Navigation
Install the app
How to install the app on iOS
Follow along with the video below to see how to install our site as a web app on your home screen.
Note: This feature may not be available in some browsers.
More options
You are using an out of date browser. It may not display this or other websites correctly.
You should upgrade or use an alternative browser.
You should upgrade or use an alternative browser.
SBD-2 Dauntless "Black B-1" Lt. Richard H. Best VB-6 Uss Enterprise Group Build
- Thread starter Njaco
- Start date
Ad: This forum contains affiliate links to products on Amazon and eBay. More information in Terms and rules
More options
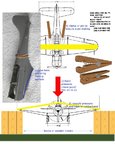
Who Replied?So what I did was fill the area with glue as best I could and then physically hold it in place for about an hour (the sloping sides didn't allow for a clamp).
wooden clothes pins come in handy and are cheap and disposable- take em apart and shape the contact points with a file to fit curves and contours during dry fit, reassemble the pin and fine tune to the perfect fit.
- Thread starter
- #63
Njaco
The Pop-Tart Whisperer
Thanks james. Another good thing would be to READ the instructions. Everything so far has been a problem of my own doing. The instructions say start at the fuselage and work the wing out to the tip which I should have done. The blue line on that model pic is where I had the gap with NOTHINg to glue as there was just a small shelf/lip but I worked it. Thought it was gonna be a problem.
Thanks.
Thanks.
Airframes
Benevolens Magister
Glad you got it sorted Chris. Don't you just love it when a plan comes together! (Cue 'A Team' signature tune!)
- Thread starter
- #65
Njaco
The Pop-Tart Whisperer
I just wish I wasn't so thick headed to not read the instructions. This is a better model than that 410 and detail is pretty good. But its a precision build.
I just wish I wasn't so thick headed to not read the instructions. This is a better model than that 410 and detail is pretty good. But its a precision build.
When all else fails....the instructions do come in handy!!...sems like all is working out fine now ,plenty of good tips!
Doing good Chris!
- Thread starter
- #67
Njaco
The Pop-Tart Whisperer
Thanks, I really love that tip from James about the wooden clips. I have some, just never considered modifying them.
Catch22
Major
Looking good Chris!
- Thread starter
- #69
Njaco
The Pop-Tart Whisperer
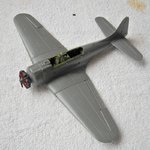
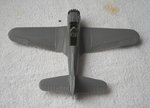
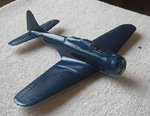
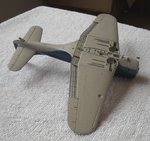
Ok, sanded the gaps, attached the engine and cowling and started with the painting. I left the botton dive flaps as they were sticky bits that I can leae till later. Same for the rear gunner (which I have confirmed is a single .30 cal - twins didn't happen until the -3.). Almost ready for decals.
Attachments
Catch22
Major
Looking good Chris!
Airframes
Benevolens Magister
Wow! That was a rapid turn around Chris! The paintwork looks excellent, good work mate!
lesofprimus
Brigadier General
Wow, some trials and tribulations goin on in this thread... Glad to see u got it sorted out Chris....
109ROAMING
2nd Lieutenant
Looking good!
great fix and paint job Chris, well done mate
Impressed Chris well done mate
Lucke.stz
Senior Airman
Wow ! so fast ! The painwrok is so good 
Lucke.stz
Senior Airman
Wow ! so fast ! The paintwork is so good 
- Thread starter
- #80
Njaco
The Pop-Tart Whisperer
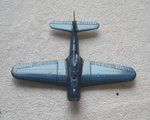
Haven't done much the last few days. I'm trying to plan how to proceed. there are a lot of little bits that I don't want to break and the off-color red of the dive flaps (have to figure the best way to do that without globs of correction paint). The biggest is there are 2 white stripes angled up the rudder and haven't decided whether to modify some decals or try to freehand brush. hmmmm............
Users who are viewing this thread
Total: 1 (members: 0, guests: 1)

