- Thread starter
- #81
Airframes
Benevolens Magister
Thanks very much Andy, it's getting there.
A bit more progress, with the engine and cowling installed, after some minor modifications to the mounting point, the first decals are on, and work is under way making the longer exhaust. I also discovered some small vents on the centre section underside and lower starboard engine cowling which need to be added. Pilot holes have been marked, and these will be drilled later and the tubular vents added from stretched sprue.
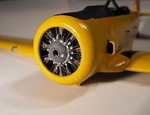
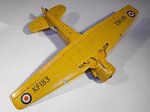
PIC 1. The engine and cowling in place, with the crank case and push rod tubes yet to be gloss coated, and a little touch-up on the crank case and other areas.
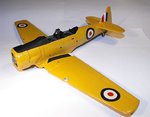
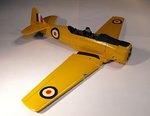
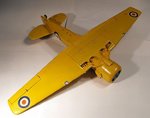
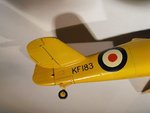
PICS 2 to 4. The roundel and fin flashes decals in place, sourced from the spares files. The fin flashes, from a Spitfire MkVB, need a little re-touching around the fin leading edge, which will be done when fully set. The serial number and BD crest decals have yet to be made, and will then be applied, along with around 40 or more stencils.
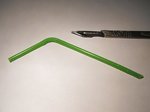
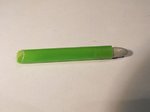
PIC 5. The long exhaust tube will be constructed using a small-bore plastic drinking straw, salvaged from one of those squishy carton drinks.
PIC 6. The start of the exhaust. The straw has been cut to length, with the exhaust end cut diagonally, and a piece of roughly shaped sprue superglued into the front end. This will be correctly shaped, drilled in the end and a small tube inserted, and the joint bound with a strip of tape, to simulate the bracket. Once painted, it will be attached to small blocks of plastic attached inside the exhaust outlet port on the cowling, and on the fuselage side.
That's the state of play so far, and I should get some more done in the next couple of days.
A bit more progress, with the engine and cowling installed, after some minor modifications to the mounting point, the first decals are on, and work is under way making the longer exhaust. I also discovered some small vents on the centre section underside and lower starboard engine cowling which need to be added. Pilot holes have been marked, and these will be drilled later and the tubular vents added from stretched sprue.
PIC 1. The engine and cowling in place, with the crank case and push rod tubes yet to be gloss coated, and a little touch-up on the crank case and other areas.
PICS 2 to 4. The roundel and fin flashes decals in place, sourced from the spares files. The fin flashes, from a Spitfire MkVB, need a little re-touching around the fin leading edge, which will be done when fully set. The serial number and BD crest decals have yet to be made, and will then be applied, along with around 40 or more stencils.
PIC 5. The long exhaust tube will be constructed using a small-bore plastic drinking straw, salvaged from one of those squishy carton drinks.
PIC 6. The start of the exhaust. The straw has been cut to length, with the exhaust end cut diagonally, and a piece of roughly shaped sprue superglued into the front end. This will be correctly shaped, drilled in the end and a small tube inserted, and the joint bound with a strip of tape, to simulate the bracket. Once painted, it will be attached to small blocks of plastic attached inside the exhaust outlet port on the cowling, and on the fuselage side.
That's the state of play so far, and I should get some more done in the next couple of days.