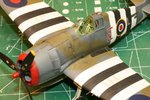
**** DONE : 1/48 Hellcat Mk I JV-131 No 800 Squadron HMS Emperor

Ad: This forum contains affiliate links to products on Amazon and eBay. More information in Terms and rules

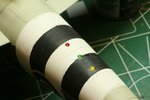
Some pics of the completed (more or less) weathering, filth, and grime around the engine and wing access areas. Applications were as follows: Underside panels around engine area got a preshade of black under the Sky colour. Next, top and bottom, came some black chalk pastels or graphite brushed around the panel lines, then some silver pencil to pick out scratched paint, then some patchy sanding around hatches and walkways where the paint would be buffed by shoes and hands, then white and black pastel chalk in the exhaust areas, then finally a thin wash of thinned black enamel for oil stains.

Fiddley bits are going on now. As you can see, the wheels have been installed. The bottom of the tires have been flattened (the white stripe you see is the plastic card spacer) and the brake line ends (not seen here) have to be curled around and attached to the hubs. The slot on the bottom will receive the drop tank.

The canopy has been attached in the open position. This machine had the wire antenna removed and whip antennas installed so the antenna post is just a stub which can be seen just behind the canopy. Whip antennas will be added later using sprue.

May get this finished on the weekend. We'll see!
 

Attachments

  • 100409 Weathering 1.jpg
    100409 Weathering 1.jpg
    96.7 KB · Views: 147
  • 100409 Weathering 2.jpg
    100409 Weathering 2.jpg
    95.8 KB · Views: 150
  • 100409 Weathering 3.jpg
    100409 Weathering 3.jpg
    93.5 KB · Views: 145
  • 100409 Underside.jpg
    100409 Underside.jpg
    90.9 KB · Views: 145
Last edited:
I'm calling this one DONE! Here are a few final detail shots. Official GB Finished shots are in a separate thread.

Pic 1 shows the finished weathering and general crud around the engine. The photo does not pick up the glossy buffed areas at all. You'll have to come over to my house to see. Seen to the top right are the two whip antennae.

Pic 2 shows the whip antennae and upper signal/nav lights. Eduard pushed the envelope and provided clear parts to insert into these holes but just try trimming the excess plastic off after cutting them from the sprue. Boing - off into the ether. Instead, I filled the holes with several droplets of Future after painting. The antennae are stretched sprue inserted and glued into tiny predrilled holes.

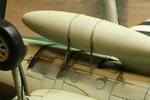
Pic 3 is of the drop tank and the nifty PE straps with tensioning buckles and all.

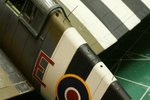
Pic 4 - completed landing gear. Quite a few tiny parts here. Missing and presumed dead are two PE attachments between the oleo strut and gear door that I accidently flipped into oblivion when I dropped my knife on the container in which they were put so I wouldn't lose them.....:rolleyes: The added brake line can be clearly seen.

Pic 5 shows the similar treatment of the underside signal lamps. Drops of Future make up the lenses in lieu of the kit-supplied clear parts.

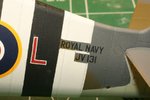
In Pic 6 we see a detail of the RN call letters that were masked into the stripes.

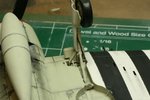
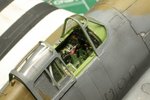
Pic 7 is a final look at the finished pit with all the PE stuff that made up the various levers. the throttle quadrant is entirely PE with separate knobs for mix, throttle and pitch. Also seen are some PE placards that were added on the canopy rail to finish this area off.

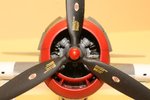
Finally, Pic 8 is a nose on shot showing the engine and prop details. A nice PE grille was provided in the kit in the lower intake. A little silvering on the prop decals but what the hey.

The fit on this model was excellent and fortunately very little filling was needed. I'd recommend this kit to anyone. There's a second Hellcat in the box that I'll get to after I get this one out of my system. One is enough for now. Thanks to all of you for watching this build and for your kind comments along the way. Looks like I'll be back onto my Bf-110 to finish that off.
 

Attachments

  • 100412 signal lamps.jpg
    100412 signal lamps.jpg
    77.5 KB · Views: 143
  • 100412 gear details.jpg
    100412 gear details.jpg
    88.3 KB · Views: 141
  • 100412 Drp tank.jpg
    100412 Drp tank.jpg
    90.1 KB · Views: 141
  • 100412 Antennae.jpg
    100412 Antennae.jpg
    92.3 KB · Views: 148
  • 100412 10 oclock hi.jpg
    100412 10 oclock hi.jpg
    121.3 KB · Views: 143
  • 100412 RN JV131.jpg
    100412 RN JV131.jpg
    90.3 KB · Views: 140
  • 100412 Pit closeup.jpg
    100412 Pit closeup.jpg
    99.3 KB · Views: 139
  • 100412 Nose on.jpg
    100412 Nose on.jpg
    89.9 KB · Views: 139
Last edited:
Some years have passed and I did not even fill up a month here.

I enjoyed the whole process of your great aircraft Andy (Crimea_River). :thumbup:

I congratulate you for the excellent work on the details, painting and finishing.:shock::idea::lol:
It is a model that should be present in any collection, and your work will be a great reference for when I get my hands on one of these.:rolleyes:

best regards.

SANCER
 

Users who are viewing this thread

Back