- Thread starter
- #141
N4521U
Plastic Pirate
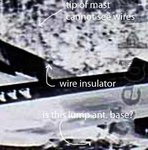
Hmmmm is right. I do have several photos of his plane, but I wish I had something difinative for all this tangled wire.
Follow along with the video below to see how to install our site as a web app on your home screen.
Note: This feature may not be available in some browsers.
Ad: This forum contains affiliate links to products on Amazon and eBay. More information in Terms and rules
Hey, Bill,
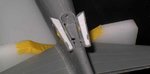
Looking very nice. I have a Mossie that I have separate resin control surfaces for. I was wondering about how to attach the surfaces. I like the idea you have there. Just wondering how I am gonna attach the elevators.