lesofprimus
Brigadier General
Lookin great Kev....
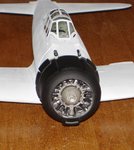
Ur radial engine makes the one in my Corsair look like I detailed it in 30 minutes...
Ur radial engine makes the one in my Corsair look like I detailed it in 30 minutes...
Follow along with the video below to see how to install our site as a web app on your home screen.
Note: This feature may not be available in some browsers.
Ad: This forum contains affiliate links to products on Amazon and eBay. More information in Terms and rules
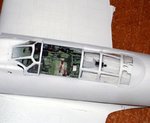
 .I used frisket paper something I have not used forever and this paper was softer almost like parafilm which allowed it to conform.The seatbelts from Eduard were nice but the back strap was to thin for scale and it shows the lap looks fine.Pics........
Nice Kevin, looks a bit light in colour to me though....
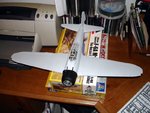
Could be Wayne I used FS36495(light grey) @ 75% and 25% White it still looks grey just a bit lighter.I use to have some IJN grey and it was lighter than this but then again could be the flash or lighting who knows I am liking her though.Cheers Kevin