**** DONE: 1/48 CAC CA-13 Boomerang - Aircraft Nose Art GB.

Ad: This forum contains affiliate links to products on Amazon and eBay. More information in Terms and rules

Sorry Bill and Peter, I missed your replies regarding the punch set and decals. Thanks for the info, I think I'll look out for the decals. And Bill, that punch set is around £55 in the UK, with the cheapest Waldron set at around the £80 mark.
 
Thanks!

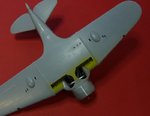
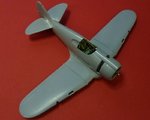
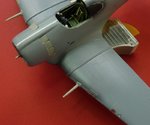
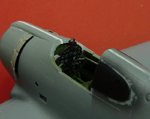
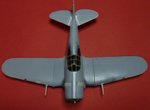
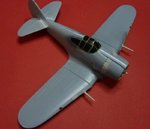
Well, got it all together at last. In the end the fit was good. I'm just focusing on the joins at the moment and using Tamiya surfacer to make sure that they can't be seen. Any large gaps were filled with a combo of super glue and talc. Engine fits well inside the cowls which appear circular from front on - which it is how it should. Upper carb intake is well, a little wide, but a necessary compromise unfortunately. One on the instrument panels didn't stay in place, but I'll get that back in before installing the canopy. I'll need to re-scribe panel lines here and there, particularly those that run across the inserts used to widen the fuselage. The wing trailing edges are also a bit on the thick side and I have 'sharpened' them up by scraping and sanding.

Cheers

Peter
 

Attachments

  • cowls 006 - resized.jpg
    cowls 006 - resized.jpg
    32.6 KB · Views: 130
  • fuselage 007.jpg
    fuselage 007.jpg
    39.3 KB · Views: 113
  • fuselage 006.jpg
    fuselage 006.jpg
    43.1 KB · Views: 123
Last edited:
I think you have done very well there Peter, I have yet to come across any kit where additional cockpit parts fit snugly, it has always been a case of trial and error, snip and tuck and the squeeze, hoping for the best.
 
Update for today

Traditionally the last day of the GB, but thanks for the extension Judges, otherwise I may not have made this one! :D

The Boomer is all together, and I am just getting all the details organised to allow for painting perhaps tomorrow.

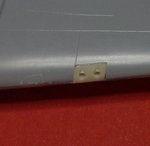
Pic 1
Resin insert for the machine guns (303's) go in the wing leading edge. A little bit of work to blend them in, but a nice touch.

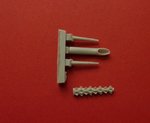
Pic 2
Resin details for cannon and exhaust to be added. For this CA-13 I am using the porcupine version and the nice tubular version goes in the spares.

Pic 3
Cowl flaps are also resin. I have painted them aluminum plate on the reverse, but you just wont see that from the outside.

Pic 4
Cowl flaps installed. Operation was a bit fiddly to get them to sit just right. I have also painted the rear vision panel area dark German grey. This area was painted black at the factory, but I intend to fade out the paint quite a lot, so I went with the dark grey.

Pic 5
Cannon installed.

Pic 6 7
Gun sight is a resin and etch combo, with Special Hobby providing the clear sheet for the glass also.

Pic 8 9
Time to add the canopy. I first sprayed the inside with cockpit green and then removed the internal masks. It took a bit of fangling to get the canopy to sit just right, without gaps. The rear vision panels went in like a dream though.

I hope to get the undercoat tomorrow and check for flaws and issues before getting on with the painting. Yahoo! Finally!

Cheers

Peter
 

Attachments

  • gun port 001.jpg
    gun port 001.jpg
    75.9 KB · Views: 127
  • gun port 002.jpg
    gun port 002.jpg
    54 KB · Views: 123
  • cowls 007 - resized.jpg
    cowls 007 - resized.jpg
    37.5 KB · Views: 130
  • gun port 003.jpg
    gun port 003.jpg
    50.5 KB · Views: 121
  • gunsight 001.jpg
    gunsight 001.jpg
    40.1 KB · Views: 128
  • canopy 004.jpg
    canopy 004.jpg
    37.6 KB · Views: 131
  • canopy 003.jpg
    canopy 003.jpg
    48.4 KB · Views: 128
  • cowls 008 - resized.jpg
    cowls 008 - resized.jpg
    28.7 KB · Views: 122
  • gunsight 002.jpg
    gunsight 002.jpg
    30.6 KB · Views: 130
Thanks!

Well, got it all together at last. In the end the fit was good. I'm just focusing on the joins at the moment and using Tamiya surfacer to make sure that they can't be seen. Any large gaps were filled with a combo of super glue and talc. Engine fits well inside the cowls which appear circular from front on - which it is how it should. Upper carb intake is well, a little wide, but a necessary compromise unfortunately. One on the instrument panels didn't stay in place, but I'll get that back in before installing the canopy. I'll need to re-scribe panel lines here and there, particularly those that run across the inserts used to widen the fuselage. The wing trailing edges are also a bit on the thick side and I have 'sharpened' them up by scraping and sanding.

Cheers

Peter


Peter,

This is a magnificent effort. I have one of these in my stash but I haven't plucked up the courage to do it yet - your work has really inspired me, though (and given me a ton of info that will help when I do finally take a run at mine). One dumb question, though...did the Boomer really have such an open wheel well? I can imagine that area between the firewall and the cockpit getting thoroughly gunked with dust and mud given some of the rough strips these birds operated from.

Cheers,
B-N

Thanks Buffnut. Not a dumb question. Yes the Boomerang had open wheel wells. As to whether there was a canvas inner cover to stop dirt ending up in the engine and ancillary areas, I have not seen a picture with anything like that. I do have the Overhaul Manual, but again no mention of any inner cover to remove.

Cheers

Peter
 

Users who are viewing this thread

Back