
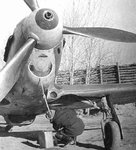
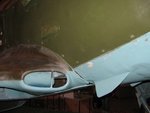
Undoubtedly a very good work on the air intake, Bill. It can be an example of correct makieg of a such things. However it seems that there wasn't the one at the starboard wing root of both Yak-1B and the early Yak-1M. There was an hole of a small diameter only, I'm afraid.

Navigation
Install the app
How to install the app on iOS
Follow along with the video below to see how to install our site as a web app on your home screen.
Note: This feature may not be available in some browsers.
More options
You are using an out of date browser. It may not display this or other websites correctly.
You should upgrade or use an alternative browser.
You should upgrade or use an alternative browser.
**** DONE: 1/48 Yak-1b Lilya Litviak, the VVS - Aircraft of the Aces GB.
- Thread starter N4521U
- Start date
More options
Who Replied?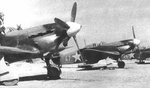
- Thread starter
- #102

N4521U
Plastic Pirate

le_steph40
Chief Master Sergeant
Hello,
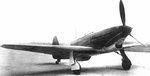
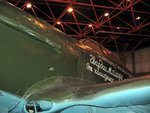
Wurger is right, there only one air intake on the Yak-1 (on the port wing root).
The picture you show are from . () but Massimo Tessitori has noticed the error here Yakovlev Yak-1, Yak-7, Yak-9
See below the page at "Links to walkaround pages".
Other link (in russian) Àíòîëîãèÿ ßê
HTH, regards
Steph
Wurger is right, there only one air intake on the Yak-1 (on the port wing root).
The picture you show are from . () but Massimo Tessitori has noticed the error here Yakovlev Yak-1, Yak-7, Yak-9
See below the page at "Links to walkaround pages".
Other link (in russian) Àíòîëîãèÿ ßê
HTH, regards
Steph
- Thread starter
- #104
N4521U
Plastic Pirate
welldon'thatjustbeatall

brucejscott
Staff Sergeant
Bummer. Nice job though.

Bill your's could become a new prototype version with 2 intakes for better balance.....maybe?
Anyway it was good practice work for making intakes....now it will be good practice for filling them in too!
Anyway it was good practice work for making intakes....now it will be good practice for filling them in too!
- Thread starter
- #107
N4521U
Plastic Pirate
Wurger, I actually thank you for the heads up, I just wish I had gotten one before I did all the work.
Wayne, don't you just have a way of making us look at "the brighter side of..."
*The only good thing is I now know how to work with "Milliputin"
But, I do have four other projects to take my mind off this kafuffle!
Wayne, don't you just have a way of making us look at "the brighter side of..."
*The only good thing is I now know how to work with "Milliputin"
But, I do have four other projects to take my mind off this kafuffle!
Last edited:

Crimea_River
Marshal
You should have mirror-imaged the photos. We never would have known.
- Thread starter
- #109
N4521U
Plastic Pirate
You should have mirror-imaged the photos. We never would have known.
yeah........ riiiiight.
Wayne, don't you just have a way of making us look at "the brighter side of..."
*The only good thing is I now know how to work with "Milliputin"
SEE !!! it was worth it! and you learnt even more!!

- Thread starter
- #111
N4521U
Plastic Pirate
If learning more by ones mistakes is true............
I've learnt too darned much.
I've learnt too darned much.
Wurger, I actually thank you for the heads up, I just wish I had gotten one before I did all the work.
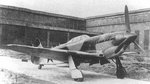
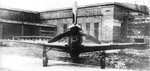
I'm so sorry Bill for making you wired about these air intakes. Please don't be angry of me. I was sure you followed the correct path looking at your picture with the putty applied to the port wing root. And it was fine at that moment. But the next updating showed you did it to the starboard one too. So I decided to let you know there's something wrong with that. The kind of two air intakes appeared with M106 engine and can be noticed on late Yak-1M or Yak-3.
Attachments
- Thread starter
- #113
N4521U
Plastic Pirate
Hey not to worry about sorry mate. This is how we get it right. Like Wayne pointed out, I now have new skills. The only disappointment is my not paying attention to the actual aircraft pictures. I can blame it on age! The end product is what matters, how we get there? Maybe a few stumbling blocks, but then, that is model building for yah!
I see. THX. 
As far as the incorrect air intake is concerned... I think you could fill the aperture with the same putty you used for shaping of the intake and then sanding down the area to the previous shape. I know it's some more of work on the model. But is shouldn't be difficult to do that.
As far as the incorrect air intake is concerned... I think you could fill the aperture with the same putty you used for shaping of the intake and then sanding down the area to the previous shape. I know it's some more of work on the model. But is shouldn't be difficult to do that.
C'mon Bill show us them skills of yours...
brucejscott
Staff Sergeant
If learning more by ones mistakes is true............
I've learnt too darned much.
" I have not failed. I've just found 10,000 ways that won't work "
Thomas A. Edison
Even the best screw up from time to time. You're doing good.
Where's that newest mod. Bill?

Lucky13
Forum Mascot
We're waiting Bill....
- Thread starter
- #119
N4521U
Plastic Pirate
Gone is the mod craze Wayne............. goin for accuracy.
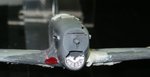
So, I have removed all the Putin and did a plug on the starboard side and a new lump of Put on the port. When it has dried I'll give a go with the file and sandpaper and see what I can come up with.
Good thing we have till the end of November!
Don't we?????
So, I have removed all the Putin and did a plug on the starboard side and a new lump of Put on the port. When it has dried I'll give a go with the file and sandpaper and see what I can come up with.
Good thing we have till the end of November!
Don't we?????
Attachments

Users who are viewing this thread
Total: 1 (members: 0, guests: 1)


