Airframes
Benevolens Magister
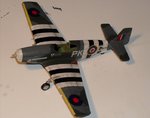
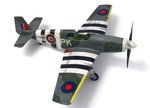
Great job Igor, the weathering looks just right.
The 'dark' appearance to the model pics is due to the (relatively) low light conditions (especially if taken indoors under artificial light), and the short range to the subject. This is because the camera will have set to an aperture which is wide, but with a shutter speed which is just about usable, hand - held. This will allow a reasonable to good photo, but will be prone to any slight movement, especially 'camera shake', which can even be just the natural pulse of the human body.
In these conditions, if the camera has the capability, then a tripod, a table-top mini-tripod, or some other way of steadying the camera will help enormously. Also, if possible with the particular camera, adjust the 'white balance' for the shooting conditions, use a sheet of white paper or cloth as a reflector on the opposite side of the light source and/or as a background, and set the camera for the required conditions. Preferably (with a tripod), this should be a slow shutter speed, and, for depth of field, the smallest aperture possible. (Small aperture = high F number. That is, f2 = wide open, f22 = almost closed aperture.).
Hope this helps.