Fw 190D-9 "Red1" of JV44 Lt. Heino Sachsenberg.... (1 Viewer)

Ad: This forum contains affiliate links to products on Amazon and eBay. More information in Terms and rules
Status
Not open for further replies.
Dan: Just spied this thread, and started at the beginning. Bravo Zulu, my
friend. Think I'll stick to balsa and tissue, thank you !

Charles
 
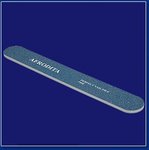
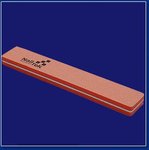
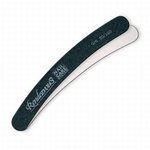
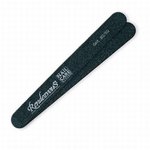
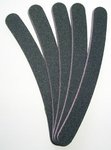
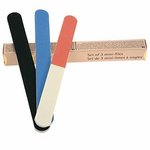
Oh Dan, Dan... you don't have any proper sandpaper tool :shock: .Look around more careful,please.Or what is better ask Les' Bride if she knows what these are and where these can be bought.She will help you for sure.:D :D :D

Look at these shots,please. Interesting tools for sanding and polishing, don't they?
 

Attachments

  • 11.jpg
    11.jpg
    45 KB · Views: 107
  • 12.jpg
    12.jpg
    13.7 KB · Views: 104
  • 13.jpg
    13.jpg
    14.2 KB · Views: 117
  • 16.jpg
    16.jpg
    14.5 KB · Views: 117
  • 52071.jpg
    52071.jpg
    15.2 KB · Views: 102
  • 52088.jpg
    52088.jpg
    16 KB · Views: 106
  • miwo4005_1047d.jpg
    miwo4005_1047d.jpg
    12.4 KB · Views: 103
  • miwo4011_104210d.jpg
    miwo4011_104210d.jpg
    15 KB · Views: 102
  • bk33.jpg
    bk33.jpg
    29.5 KB · Views: 119
  • bk34.jpg
    bk34.jpg
    30.1 KB · Views: 124
Thanks gents....

And for the record, filling in seams scares the sh!t outta me... I dont have the proper sandpaper tools to do a proper job of it...

Different diameter pencils, etc with 240-600 grit sandpaper works very well for filets (for me). anything flat works for the rest of the stuff. Depending on radius I have used a 30-06 case, a screwdriver shank, etc
 
Its only natural that I am detail oriented in this hobby....

Ive tried different methods for sanding, and I have a couple of sanding sticks that do the job, but i dont have any fine grit sandpaper besides whats on my sticks..

The thing thats getting me is that theres some details on these seams that are gonna be lost forever with the putty, and I cant seem to get the sanding done right to match the existing plastic.... Take for example my Fw 190A-8 that I did... The seams looked horrible and would have probably looked better if I left them alone...

So.............

We'll see where I go with this.....

And Im doin the best I can for both of us Bill hehe...
 
OK, some progress pics.... All that detail in the wheelbay gets covered up in the end....

How freakin sad, just like the cockpit... Atleast I know the detailing is there hehe...

You got that right Dan! It's one of those annoying things about model building... but also satisfying!!

Doing great so far mate!:D

All those lovely sanding sticks and I have never used one......400 through 1200 grade sandpaper is my preferred weapon...
 
Its only natural that I am detail oriented in this hobby....

Ive tried different methods for sanding, and I have a couple of sanding sticks that do the job, but i dont have any fine grit sandpaper besides whats on my sticks..

The thing thats getting me is that theres some details on these seams that are gonna be lost forever with the putty, and I cant seem to get the sanding done right to match the existing plastic.... Take for example my Fw 190A-8 that I did... The seams looked horrible and would have probably looked better if I left them alone...

So.............

We'll see where I go with this.....

And Im doin the best I can for both of us Bill hehe...

You are doing a great job..

'back in the day I had (actually still have) several tools for detail 're-work'. Tongue depressors I used to a.) stir glue/epoxy ranging from epoxy for glass bedding to putty mixes for filets -and b.) uses as a flat surface to wrap different grits around for fine and finer sanding work

Then the very flexible 'membership card type' plastic was great for lining up to etch new panel lines with

My Engineering Drawing Kit Divider - sharp metal pointed pin used to 'dig' new panel lines where wing filet or other sanding covered up the original. If you haven't done this before, and ignore me if you have, use the divider point in a light 'pull' - versus push to get a 'guide line which isn't too deep to not be able to sand out on a mistake. Then a little harder as the line gets defined.. but always light. The pressure is against the plastic edge so an inward slip scratches the 'platic ruler' not the next panel over

BTW on 1/32 scale US aircraft.. I found that the Monogram 1/48 B-17 and B-24 decal sets have 'lable or title' lettering under the decal to identify it - was a perfect size to do 'names' on canopy or Pilot/Crew Chief ID plates.

I got just about a perfect scale "LT. COL BERT W MARSHALL JR" on my hasegawa P-51 Canopy under the Swastika's . Course it is a bit#h to cut individual letters and individually use a toothpick to place the wetted letter decals..
 
truthfully bud I wouldn't touch your model with a 10 foot pole, my eyes are crap and my patience has run thin on detailed things like this................good work by the way. this will of course be a true Dora from II./JG 301 !!
 
Dan, just noticed that the etched metal above the starboard exhaust is glued flat to the cowling- that should stick out from the cowl as it was to there to prevent exhaust gases entering the intake.
 
Evan, it is actually correct you just can't see the bent section that does stick out because of the angle...post another shot Dan.....:)
 
It is really good tip Matt.But it can be used when there are some quite small gaps between two parts and the rest of surface is good.:D
 
Re the exhaust shield, I thought that might have the case too at first, Wayne, but check out the shots of the lower cowl which follow it...
 
Status
Not open for further replies.

Users who are viewing this thread

Back