Avenger II, 857 Squadron, FAA, HMS Indomitable, December 1944, Group Build. (2 Viewers)

Ad: This forum contains affiliate links to products on Amazon and eBay. More information in Terms and rules

Er..OK then! But how about 'unless I drink too much of the Cotes du Rhone that's on the work bench next to me'. Does that sort of 'unless' count towards being acceptable? It would have been a single malt, but I'm being sensible at the moment...and frugal!
 
Unless it helpd me conentrate on success!
I got the turret in!
This is a bit of a long post, with quite a few pics, but it's mainly aimed at helping Cory, so I hope you'll all bear with me.
I re-checkked the original AM instruction sheet, and had a look at their web-site, as suggested in the instructions. Just shows, I'm obviously not the only one who's had problems then! Anyone using the Italeri instructions would be stuffed, as there are only rather poor drawings, and no guide notes.
So, first, I had a bit of a fiddle with the turret, as a 'dry run', before re-painting the framework, then giving the whole lot a coat of 'Klear' (Future), in the hope that this would minimise any paint wear whilst handling the darned thing. When the 'Klear' had dried, the framework was treated to some clear matt, and then allowed to dry, whilst I got on with masking and painting the main canopy. Some job, as the framework, being to perfect scale, is very fine. In fact, it's so nicely reproduced, and the canopy itself so thin and crystal clear, I decided against cutting open the two sections over the observer's cockpit, as originally planned.
When the turret had fully dried, the installation job commenced.
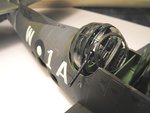
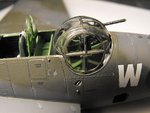
PIC 1 shows the first step, inserting the unit at 90 degrees to the fuselage, and at an angle of approximately 45 degrees to the vertical.
PIC 2 Notice the forward edge of the turret rim is slightly proud of the fuselage. This was very carefully eased into position, exerting very gentle pressure on the turret sides, hoping the joint in the glazing didn't spring apart!
PIC 3 The turret was then pressed down into place, again gently.
PIC 4 With the turret now in, it was twisted into position, to face aft.
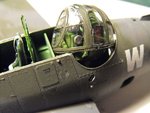
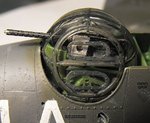
PIC 5 IT'S IN ! Note the paint that's rubbed off parts of the framework - this was retouched later.
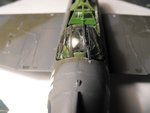
PIC 6 A visual check from the rear showed that the turret wasn't level.
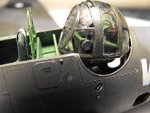
PIC 7 The bottom rim of the turret was too high on the starboard side, indicating that the turret lugs hadnt engaged into the cut-out slots in the mounting plate. (It's a good idea to ensure that the inner face of the latter is free of any paint, to enable easier seating.)
I didn't want to force anything, with possible damaged to the delicate glazing, so the turret was twisted back 90 degrees, pressed down, and then turned to face aft again. It still isn't fully located, but at least it's seated better, and looks acceptable. Good enough!
PIC 8 Using the circular frame as a reference, the port side of the turret was checked to ensure the spacing was equal to the opposite side.
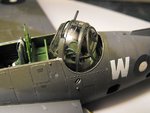
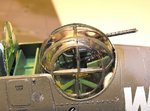
With the turret in place, and intact, the next stage was the fitting of the cabin shelf, Part 20A in the Italeri instructions. This had already been painted interior green, and a test fitting showed that there shouldn't be any problems locating and glueing it PIC 9
Small spots of poly cement were applied to the two transverse fuselage ribs, using the point of a cocktail stick, and being very careful not to get any cement on the rear of the turret glazing!
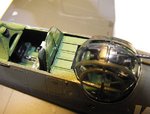
PIC 10 shows the shelf in place and fixed.
So, at last, the turret is in place, and the main canopy section can be fitted.
This, and the following stages, will be shown in the next installment.
I hope this helps a bit Cory, and you'll be glad to know that it wasn't nearly as difficult as I at first thought!
Thanks again for your interest and kind comments guys, now I'm off to bed!
Terry.
 

Attachments

  • PTO Build 354.jpg
    PTO Build 354.jpg
    35 KB · Views: 124
  • PTO Build 355.jpg
    PTO Build 355.jpg
    54.4 KB · Views: 113
  • PTO Build 356.jpg
    PTO Build 356.jpg
    56.5 KB · Views: 113
  • PTO Build 357.jpg
    PTO Build 357.jpg
    51.9 KB · Views: 128
  • PTO Build 358.jpg
    PTO Build 358.jpg
    54 KB · Views: 132
  • PTO Build 359.jpg
    PTO Build 359.jpg
    37.5 KB · Views: 117
  • PTO Build 360.jpg
    PTO Build 360.jpg
    61 KB · Views: 127
  • PTO Build 364.jpg
    PTO Build 364.jpg
    56.2 KB · Views: 130
  • PTO Build 365.jpg
    PTO Build 365.jpg
    52 KB · Views: 116
  • PTO Build 367.jpg
    PTO Build 367.jpg
    42.8 KB · Views: 114
Well, well, its extraordinary! May I ask how you did your panel lines, it looks like a #2 pencil but i'm sure you went beyond those means..
 
Some lines are done with a fine retractable pencil, some with paint. A few were 'feathered' at the edges, with thinned, lighter coloured paint, to simulate paint erosion and weathering, after refering to photographs. As the surface detail of the kit is superb, panel-line work has been kept light, apart from some areas were photos showed heavier weathering, wear or dirt. Thankfully, they disappear when viewed form a distance, as per the real thing.
 
Thanks very much guys, your comments are much appreciated as always. Glad the pics and explanation have helped Cory, take it steady and it will fit, just like it says on the sheet. Well, on the AM sheet, not the Italeri one!
Now, I'm deep in the brown stuff. Don't ask me how, but the small oval windows for the rear fuselage have disappeared! I made a point of putting them back in the bag, and storing them in the kit's box, after I'd done a trial fit, before painting the model. Now, they are nowhere to be seen! I'm convinced there's a bl**dy Gremlin in my house these last 24 hours, as all sorts are going wrong!
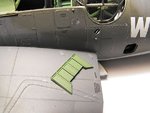
So now I'm going to have to make some windows from thin clear sheet. I just hope I can cut the shape accurately enough to fit the openings. Having spent a whole two hours searching every possible hiding place, and some impossible ones, all I've got done on the model is the painting of the anti-slip wing walk strips. After computer uploading and downloading problems, getting half way through burning a CD of PDF books for Jan and then having the bl**dy thing spitting its dummy out and corrupting a brand new disc, then losing the flipping windows, there was absoulutely no way I was going to risk working on the Avenger!
So, if the Gremlins leave me alone tomorrow, which is a National Holiday in the UK, I might make some more progress.
 
Wow Terry you might complain about your artristis and stuff but bud this has to be tied with Ozarks P40 thus far as weathering goes,this is really looking fantastic :shock:.The paint is even and flat,lines on the glass look crisp and sharp and the paint looks just the right amount faded.I do not Terry the paint,the paint,the paint.........8)
 
Terry

I 've spent the last hour or more (maybe two) going from page 1 to page 20 and this whole build is an absolute gem! Heaps of great info and wisdom gone into this one. I have one of these in my stash (AM) and presently feel very under skilled to do it justice, but this is pure inspiration! Thanks for the advice and clear pics of the turret install, and I can't wait to see the finished kite.

Cheers

Peter
 

Users who are viewing this thread

Back