Navigation
Install the app
How to install the app on iOS
Follow along with the video below to see how to install our site as a web app on your home screen.
Note: This feature may not be available in some browsers.
More options
You are using an out of date browser. It may not display this or other websites correctly.
You should upgrade or use an alternative browser.
You should upgrade or use an alternative browser.
***** DONE -Nakajima A6M2-N "Rufe" of the Yokohama Kokutai Group Build
- Thread starter ccheese
- Start date
Ad: This forum contains affiliate links to products on Amazon and eBay. More information in Terms and rules
More options
Who Replied?Great progress Charles!
- Thread starter
- #123
ccheese
Member In Perpetuity
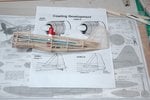
Mentiuoned yesterday that I was not happy with the way the trailing edge of the wing mated to the fuselage. Spent
almost two hours on making that fit better, today. Now I am satisfied it will mate the way it's suppose to. Spent the
rest of my allocated modeling time sanding the wing and painting with clear dope inbetween. Ditto with the fuselage.
Started covering the fruselage this evening. Because of the contours of the fuselage, you have to do it their way,
or it will look crappy. Lots of one inch by two inch pieces to go..... More tomorrow.
Charles
Njaco
The Pop-Tart Whisperer
Looks great, Wurger of the Wood!
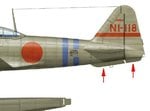
Charles .....I hope it's not too late...but I noticed your line drawing profiles actually show a standard Japanese Zero TAIL.
See the profile below for the correct shape of the tail area and the TWO lower 'Fins' that aren't shown on your line drawing...
See the profile below for the correct shape of the tail area and the TWO lower 'Fins' that aren't shown on your line drawing...
Attachments
- Thread starter
- #127
ccheese
Member In Perpetuity
Ah, good you're on top of it then!
Doing great mate!!!
Doing great mate!!!
great progress Charles
Airframes
Benevolens Magister
Coming along very Charles, looking forward to seeing more.
109ROAMING
2nd Lieutenant
With Terry -looks like fun
lesofprimus
Brigadier General
Hell yea, comin along nicely Charles....
- Thread starter
- #134
ccheese
Member In Perpetuity
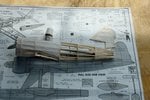
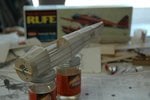
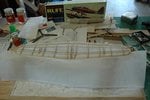
Here's where we are this Saturday afternoon. The fuselage has been covered [pic's 1 2], and has been given one
coat of the clear dope/thinner 50/50 mix. A little light sanding and we do it twice more.
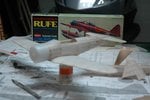
As for pic 3, I've always heard that the best way to cover a wing is with one piece of tissue, starting at the bottom
trailing edge, moving forward, up and around the leading edge, continueing to the upper trailing edge. The center
of the top will overlap, but hey..... that's inside the fuselage ! The wingtips can get a bit hairy, but I thought I would
try it. In all my years, I've never done it, or had the balls to try. Pic 3 shows the underside completed, and after about
five minutes to dry, up and over to the trailing edge. The wing is finished, and has been sprayed to tightenup the
tissue. More pic's tonight... To borrow a phrase.....
Rip it up !! [Thanks, ~ E]
Charles
Attachments
vikingBerserker
Lieutenant General
That is so impressive!
I tried a model like that once, needless to say it was pretty horrid....
I tried a model like that once, needless to say it was pretty horrid....
Looking good. Yea, start at the trailing edge and wrap back to it. To reduce the chance of warping evenly wet the tissue with a sprayer and pin it down to the board. You don't have to penetrate the wing. Insert the pins at an angle so they are touching the wing preventing any edge from lifting while it dries. I wouldn't cut through the center section until the wings are doped. Then you can cut and adjust dihedral. Always work top and bottom simultaneously as the shrinkage of one without the other will warp it into a big potato chip.
Airframes
Benevolens Magister
Great progress Charles - definitely real modelling! Last time I did it, I gave up, as a neighbours brat of a young girl punched her fingers through all the tissue on the wings of a model ready for its first powered flight -could have strangled her! Never touched one since!(flying model that is, not a brat!)
Matt308
Glock Perfection
Excellent, Mr. C. Just excellent. I'm looking forward to more. 
- Thread starter
- #139
ccheese
Member In Perpetuity
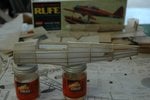
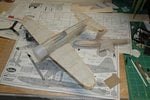
We've put the Rufe to bed for the night, but, as promised, here's a couple more pic's. All the parts are constructed,
covered and have been given at least one coat of the 50/50 clear dope. The below pic's show a dry fit..... wings
and stabilizer, to the fuselage. Oh.... stuck the cowling on just for good measure. Next step is to lightly sand all
the parts, and two more coats of the 50/50. Then we can assemble and start working on the three bladed prop and the canopy. Cheers....
edit.... oops didn't realize the first pic is out of focus. Guess the camera zero'd in on the box !
Charles
covered and have been given at least one coat of the 50/50 clear dope. The below pic's show a dry fit..... wings
and stabilizer, to the fuselage. Oh.... stuck the cowling on just for good measure. Next step is to lightly sand all
the parts, and two more coats of the 50/50. Then we can assemble and start working on the three bladed prop and the canopy. Cheers....
edit.... oops
Charles
Attachments
Catch22
Major
Looks great Charles!
Users who are viewing this thread
Total: 1 (members: 0, guests: 1)

