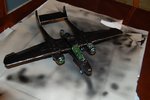
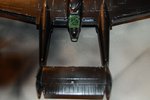
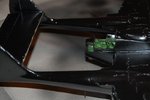
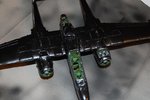
Ok.....ya Done Good mate!
Navigation
Install the app
How to install the app on iOS
Follow along with the video below to see how to install our site as a web app on your home screen.
Note: This feature may not be available in some browsers.
More options
You are using an out of date browser. It may not display this or other websites correctly.
You should upgrade or use an alternative browser.
You should upgrade or use an alternative browser.
DONE: 1/48 Revell P-61 Black Widow of Maj. Carrol C. "Snuffy" Smith Group Build
- Thread starter Maglar
- Start date
Ad: This forum contains affiliate links to products on Amazon and eBay. More information in Terms and rules
More options
Who Replied?Catch22
Major
Looking good!
Do you have any red decal paper?
Do you have any red decal paper?
- Thread starter
- #203
Well they provided red strips on the decal sheet but you have to cut them up yourself to make the walkway. Its about 6 strips of long red, while the walk way has a triangle pattern and such, it might be rough making it correct. Plus overlapping decals sucks!
Catch22
Major
Yeah it's not fun. IIRC, I painted mine, or my dad did, as this was many years ago.
- Thread starter
- #205
Heinz
Captain
Looks great Maglar mate!
Airframes
Benevolens Magister
Looking rather impressive old chap! Use the decals, just take your time, and position them using Micro Sol or similar. Probably best to do those running in one direction first, then let them set before doing the others. If you get an overlap, try using a new blade in your scalpel, and cutting the decal in position, where it joins. Any small gap etc can be touched-in later, when set. Gloss paint is better for this, which can be clear coated as required later.
- Thread starter
- #209
- Thread starter
- #212
- Thread starter
- #214
Lucky13
Forum Mascot
Beautiful work mate!
- Thread starter
- #217
Catch22
Major
You're right Mag, it does. Nice work!
- Thread starter
- #219
As much as I loved shredding paint off the booms the point of this build is to learn something and do it right, I felt no sadness in respraying it. I might revisit the leading edges though, they do look a little too toned down from the mist, or it could be the weak lighting. Painting the canopy frames now, props done and decaled, fuel tanks almost done, red walk way... tune in
Hey Corey, read your message....yeah the booms and some other spots were just a tad overdone before, looks much better now. Always start with small bits at a time in locations that are always subject to wear, front of cowls, wing leading edges, walk ways. Then you either expand those areas or add in other areas always thinking where and how it would be affected....
The best thing is that you had a good go at it...went a little far..probably, but with good intentions of course!
Then determined some was probably not quite right, repainted and adjusted your work...well done.
Remember...what you did was not a mistake!..simply part of a process that you adjusted, improved and learnt from....godd stuff mate!
Users who are viewing this thread
Total: 1 (members: 0, guests: 1)


