Airframes
Benevolens Magister
Excellent stuff Andy.
Follow along with the video below to see how to install our site as a web app on your home screen.
Note: This feature may not be available in some browsers.
Ad: This forum contains affiliate links to products on Amazon and eBay. More information in Terms and rules
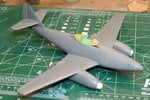
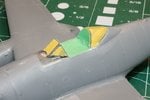
Now when I look at it the model I am seeing all kinds of fit issues - probably magnified by my sh!tty attitude.

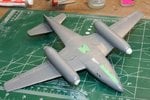
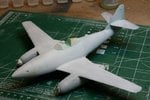
So I've decided to switch to acrylics (Polly Scale) and have struggled so far. The coat above was done with the paint thinned 50/50 with distilled water at about 10psi. Although not a disaster, I felt the paint was too thin as several areas developed runs quite easily. When I did my Bf-110 prime coat (separate thread) a couple of months back, I thinned the paint only about 10 to 20% but the brush kept clogging. So it seems the happy place is somewhere between 20 and 50%. Any recommendations/experiences to share for airbrushing Polly Scale acrylics? The squiggles on the chosen scheme are beginning to look ominous!
tamiya acrylics for me!Thanks for the info Dwight! I'll try the 30 Windex/70 Paint ratio. What about fine lines like the squiggle camo? 20 psi sounds high for that?