**** DONE 1/48 Tamiya Me 262 A-2 Heavy Hitters Group Build

Ad: This forum contains affiliate links to products on Amazon and eBay. More information in Terms and rules
Great work there mate. The brake lines look superb. Just noticed, it looks like Tamiya have moulded the oleos at full extension, which they've done on other kts too. Irritating.
 
Thanks everyone. Terry, yes they are at full extension but I figured it would be too much of a pain the a$$ to shorten them with the torgue links to fiddle with.

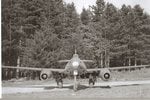
On to the paint scheme. After much deliberation about the options for the paint scheme for White Y (74/75/76 with 81 overspray vs 82/83 as the kit and other references suggest), I decided to go with the views of fellow Calgarian David E Brown who made a compelling case for this machine sporting the 74/75 scheme with 81 squiggles. He further suggests that the squiggles extended onto the wing surfaces and having looked at the head-on photo below (Photo 1), it's quite apparent on close inspection that the squiggles have been applied to the upturned elevators. This differs from the kit profiles where the squiggles are said to appear on the vertical surfaces only. It's also evident from other photos of this machine that the upper camo appears to extend around the wing leading edge and a short distance into the 76 on the undersides. So on with the painting.

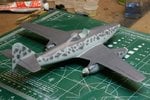
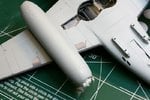
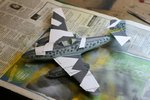
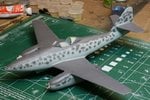
The base coat of RLM 76 was the Polly Scale acrylic but since I didn't have 74 and 75 handy in Polly Scale, I decided to go with my Model Master enamels, which I had handy, for the factory 74/75 splinter/mottle scheme. Photos 2 and 3 show the lighter RLM 75 applied. I'm still trying to get a handle on airbrushing mottles and am not overjoyed with the results. However, the squiggles will hide a lot of these anyway. On pulling away the Tamiya tape on the undersides, my Polly Scale acrylic, which had cured for the last 2 weeks, decided to part company with the plastic (Photo 4). Needless to say, I'm not impressed. This was done yesterday afternoon.

This morninng I masked off the areas to apply the RLM 74 Photo 5 . Rolls of tape kept the paper masks proud of the surfaces a bit to give a bit of a soft edge to the splinter scheme. A few more mottles were applied in 74 and the masks removed to reveal how she appears today Photos 6 and 7 basically in a factory fresh 74/75/76 scheme.

Close inspection will reveal some overspray areas but these don't concern me as the squiggles will cover them. The squiggles will be a challenge and I'm debating how to do this. Option 1 is to free hand them on, at the risk of ruining everything. The second option is to make a 2 inch square mask that I'll move around the model and overlap previously painted sections at varying angles. This will be slower but, I think, safer although I've managed to get some very fine lines going free hand but the consistency is lacking still. I'll likely spend some days practicing on paper before biting the bullet. YIKES!

Thanks for your interest.
 

Attachments

  • White Y Head On.jpg
    White Y Head On.jpg
    128.6 KB · Views: 132
  • 091219 Port Mottle.jpg
    091219 Port Mottle.jpg
    108.8 KB · Views: 113
  • 091219 Starboard Mottle.jpg
    091219 Starboard Mottle.jpg
    115.4 KB · Views: 224
  • 091219 Peeling Polly Scale.jpg
    091219 Peeling Polly Scale.jpg
    93.6 KB · Views: 107
  • 091220 Splinter Stbd.jpg
    091220 Splinter Stbd.jpg
    115.8 KB · Views: 268
  • 091220 Splinter Port.jpg
    091220 Splinter Port.jpg
    119.8 KB · Views: 224
  • 091220 Splinter Masking.jpg
    091220 Splinter Masking.jpg
    98.1 KB · Views: 228
Thanks all! Practice squiggling on paper to get brush settings and paint mixture. I think it'll be freehand work as it's going not too bad. A bit more practicing under my belt and we'll give it a go.
 
Indeed. After the 4 letter ones, it was something to the effect of this being the last batch of Polly Scale I'll likely buy.

Andy,

I've been using Polly scale a LOT and haven't had any issues with the tape peeling paint off. It could be an issue with the underlying plastic surface not having been cleaned prior to paint application. Try cleaning the model surface just before painting with either Windex, a surfactant cleaner, Simple Green solution (rinsing necesssary) or at least an alcohol wipe with 90% isopropyl or straight ethyl (Everclear) or denatured alcohol. Do NOT use common rubbing alcohol (70% isopropyl).

If that's not the case, it might be an issue of the paint mixture drying out too quickly - Polly Scale has a tendency to dry out VERY fast - so fast that it can actually hit the plastic partially dry and reduce it's ability to adhere to the plastic if you spray from too far away.

Priming can also help but in all honesty I've never had to prime any of my models and have had virtually no problems with paint peeling away.
 
Patience Karl. I looked closely at the photos and noticed that the squiggles go around the markings. So tonight I applied a coat of Future in prep for decals. Then I'll take the plunge. A few days yet.

Dwight, thanks for the info. I'm finding the Pollyscale tough to airbrush as well. Using the Windex as thinner helps but I still get clogs. Maybe I was a bit harsh but it's been a frustrating experience so far. That said, the 76 did come out beautifully, peeling notwithstanding. I must admit I've never bothered washing my builds before paint and I've never had a problem - until now.
 
Last edited:
Much progress since I last checked in.

A coat of Future was applied and allowed to dry 48 hours before the upper decals were put on (Photo 1). The port side cross on the wing ripped on me in two places. Fortunately I was able to salvage the pieces and place them properly. All of the decals set down nicely with SolvaSet.

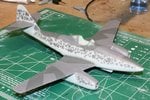
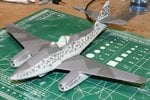
Today, I decided to take the plunge and start on the RLM 81 squiggle overspray. This turned out to be a solid 4 hours of painstaking work with constant adjustment of pressures, practice sprays onto paper and clog cleaning. This is delicate work and I wanted to paint with low pressures. The lowest I was able to go was about 10 psi. The PollyScale was thinned about 30% with Windex but I still had a lot of problems with bursts of paint coming out. It took a lot of sparying onto paper before the lines calmed down to a point where I could apply it to the model. Photo 2 shows the starboard fuselage about half done. A careful study of the real White Y shows that the overspray was applied around and through the insignia so I did the same with my airbrush, carefully spraying along the edges of the cross and the Y and circling around the smaller letter codes. Photo 3 shows the model as I now left it. The port wing overspray has been started and is about half done. The starboard wing is yet to be finished. After 4 hours of painting I was ready to call it a day. The rest will be done tomorrow.

As it turned out, I'm fairly pleased with the results despite some areas where the paint went nuts on me and I had to blend the lines in. Photos of the actual plane show an inconsistent pattern as well with some fairly thick applications of the RLM 81 so, all-in-all, I think it came out OK.

More tomorrow.
 

Attachments

  • 091226 Decals On.jpg
    091226 Decals On.jpg
    124.5 KB · Views: 93
  • 091226 Starboard.jpg
    091226 Starboard.jpg
    84.5 KB · Views: 100
  • 091226 Starboard 2.jpg
    091226 Starboard 2.jpg
    126.8 KB · Views: 101

Users who are viewing this thread

Back